Threading Hair Through the Vivify Dolls Unicorn Tail
It has been brought to my attention that threading hair through the unicorn tail piece is not as intuitive as I had anticipated. So I’ve put together this quick guide for how you can turn that pesky tail stump into a flowing unicorn tail for your doll!
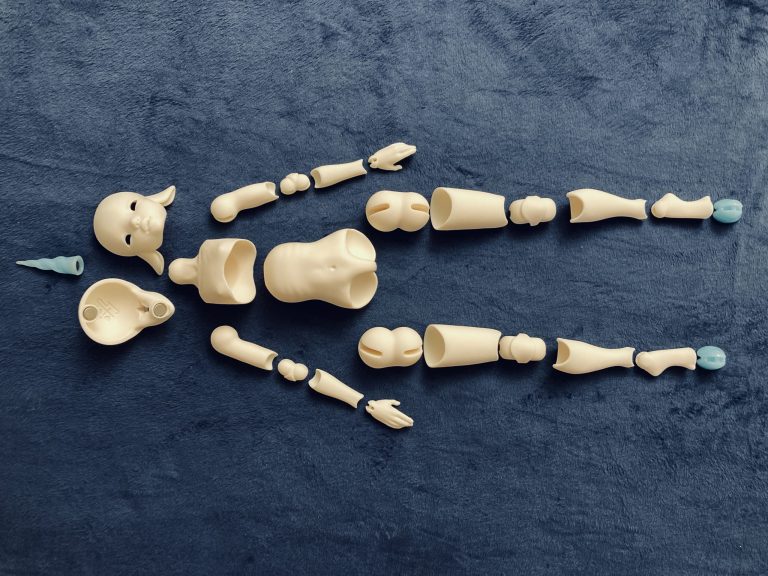
The doll featured in this tutorial is Vivify Dolls Anika on the Dancer Body (Unicorn Variant).
Step 1: Selecting Your Materials
The first step is picking out the kind of hair you want to use. There are pros and cons to the different types, but I’ll list my favorites to work with.
- Kanekalon–otherwise known as braiding hair, yaki hair, or crochet braiding hair. This is by far the best choice for stringing unicorn tails due to its stiffer and fuller texture. It is soft, heat tolerant, super easy to work with, and resembles horse hair more than traditional nylon hair. However, it is not as shiny, so it may not be everyone’s preference.
- Brushed yarn. This is the best choice for small unicorn dolls, (like the 12 cm Unicorn Dancer in my shop) but not all yarn is made equal. The best yarn I’ve found is Lion Brand’s Hometown yarn. It’s a 100% acrylic loosely spun yarn that can be carefully pulled into wefts between 4-5 inches long. However, just about any loosely spun acrylic yarn should work just fine!
- Nylon hair. In last place but still making the list, this option works fine–with some caveats. It is super shiny and easy to style, but its sleek nature doesn’t make for a very voluminous tail. If a long, shiny tail is what you’re after, and you don’t mind it being a bit thinner, this might be the option for you!
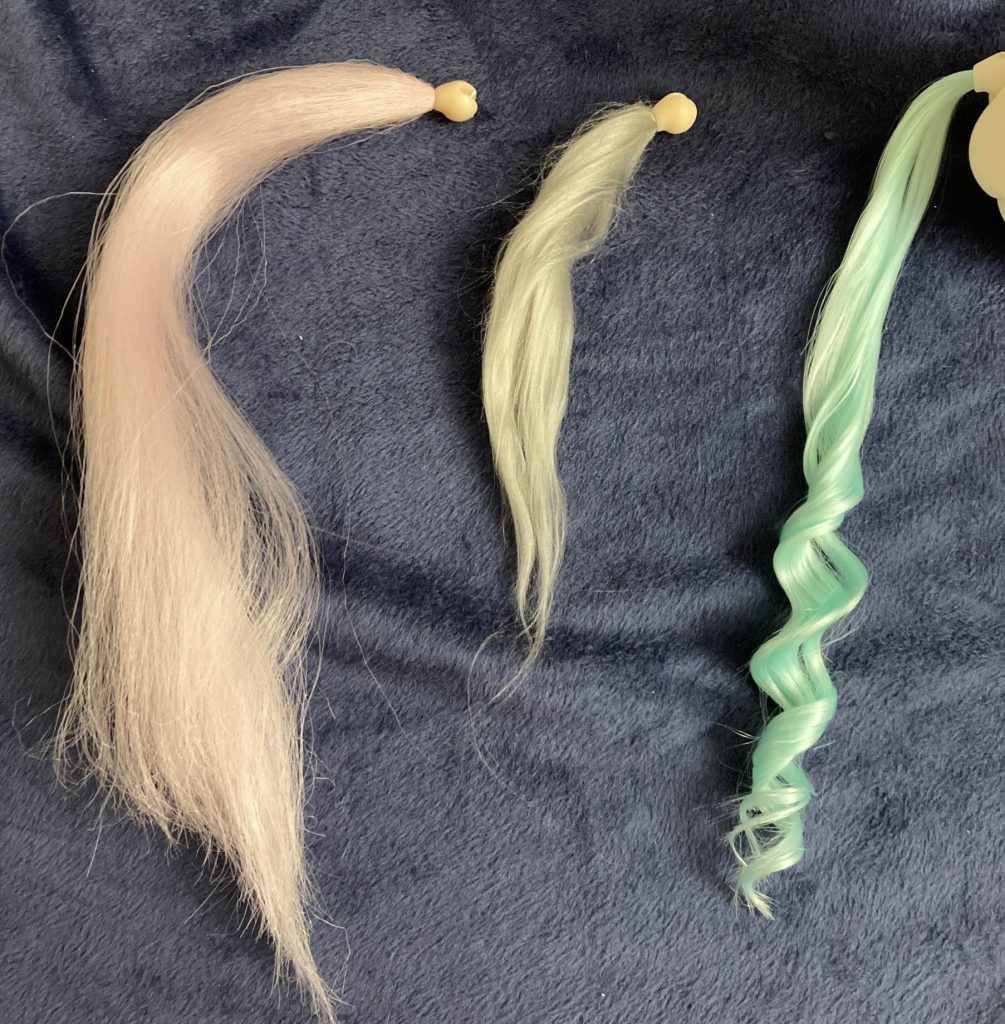
The first two are prototype versions that have a smaller hole for the hair, but they both ended up thicker than the nylon hair anyway.
Step 2: Preparing The Hair
Regardless of which option you choose, all the hair will need to be prepared before it’s ready to become a unicorn tail.
If you’ve selected brushed yarn, you’ll have to unwind the yarn, brush it out, and flat iron it until it is the texture you want. There is nothing special you need to do to prepare this outside of what you would normally do for making wefts. (I’ll make an article about this… soon?)
If you have selected Kanekalon or nylon, great! That’s what I used for this guide.
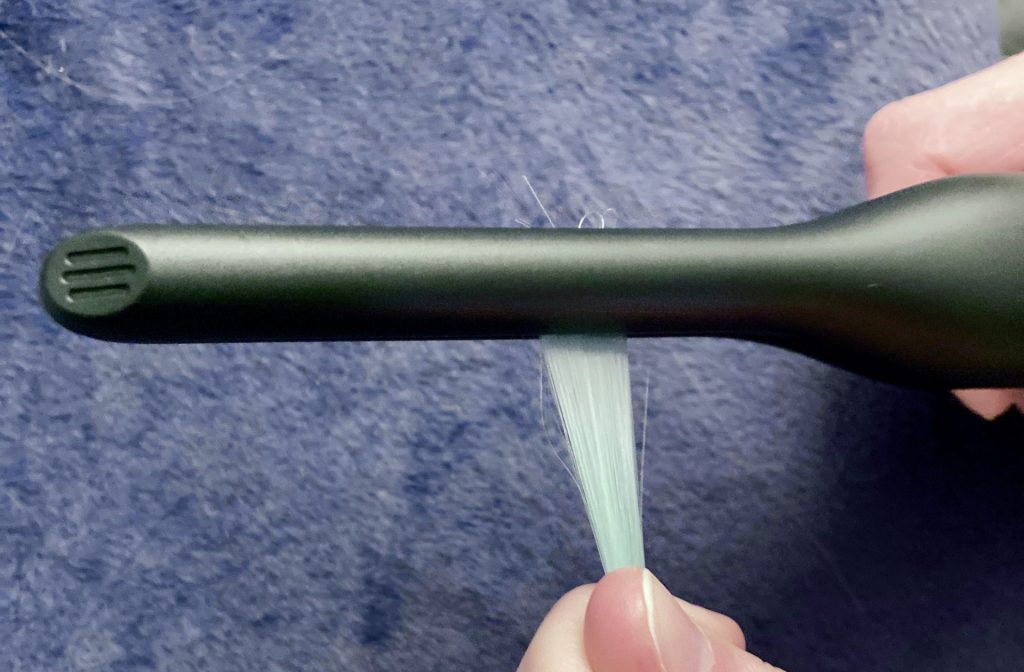
Start by cutting the hair to the length that you want, keeping in mind that your tail will be half as long as the hair, since you fold the strands in half. Cut off any mesh or thread that is attached to the hair. I used synthetic hair extensions for this, so I had to cut off the clip at one end. I also wanted a tail that would rest on the floor when the doll stands, so I measured out a length that was more than double the length of the legs.
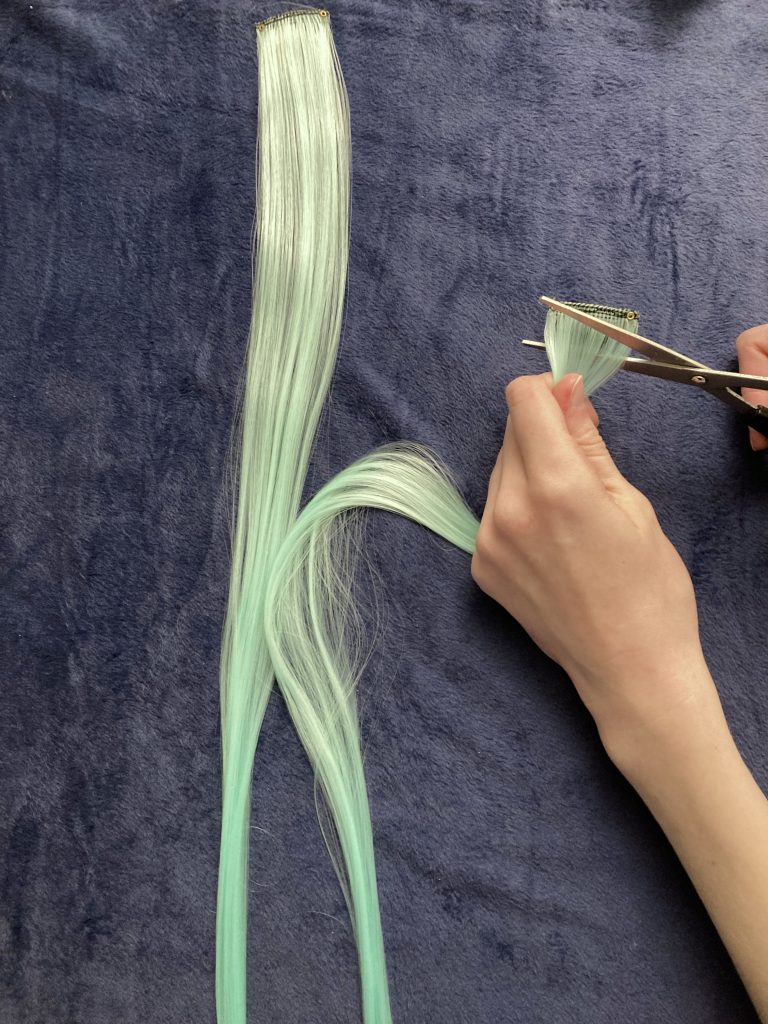
After you trim the hair, take a moment to stagger the hair so it isn’t cut straight across when you string the it into the tail.
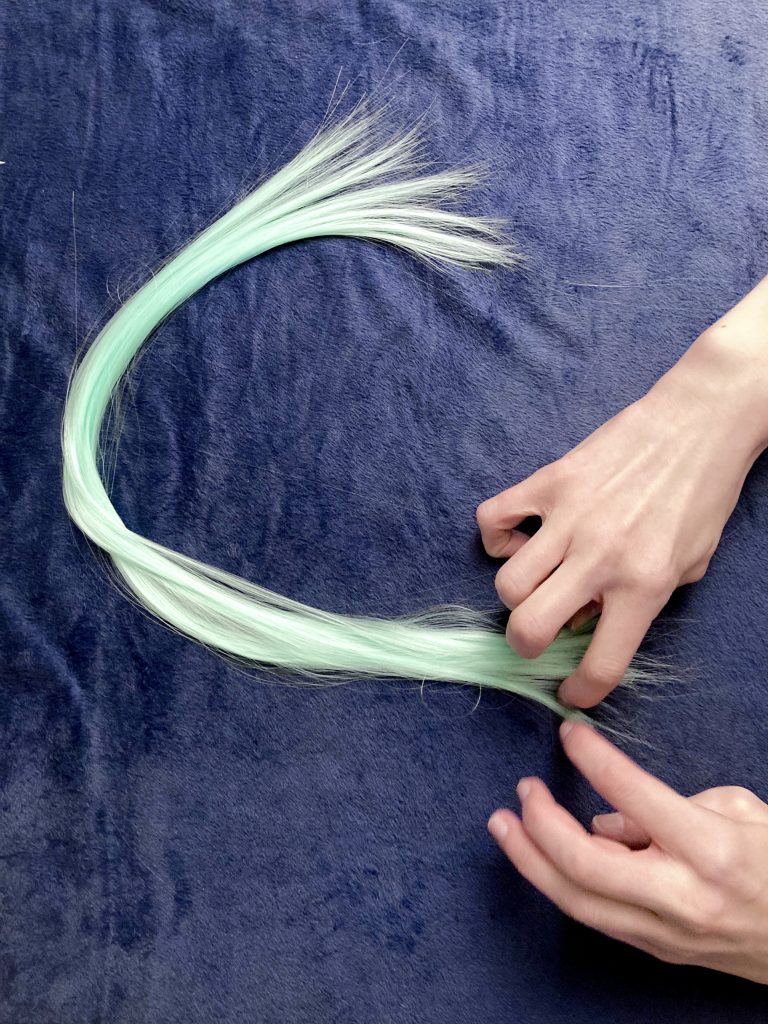
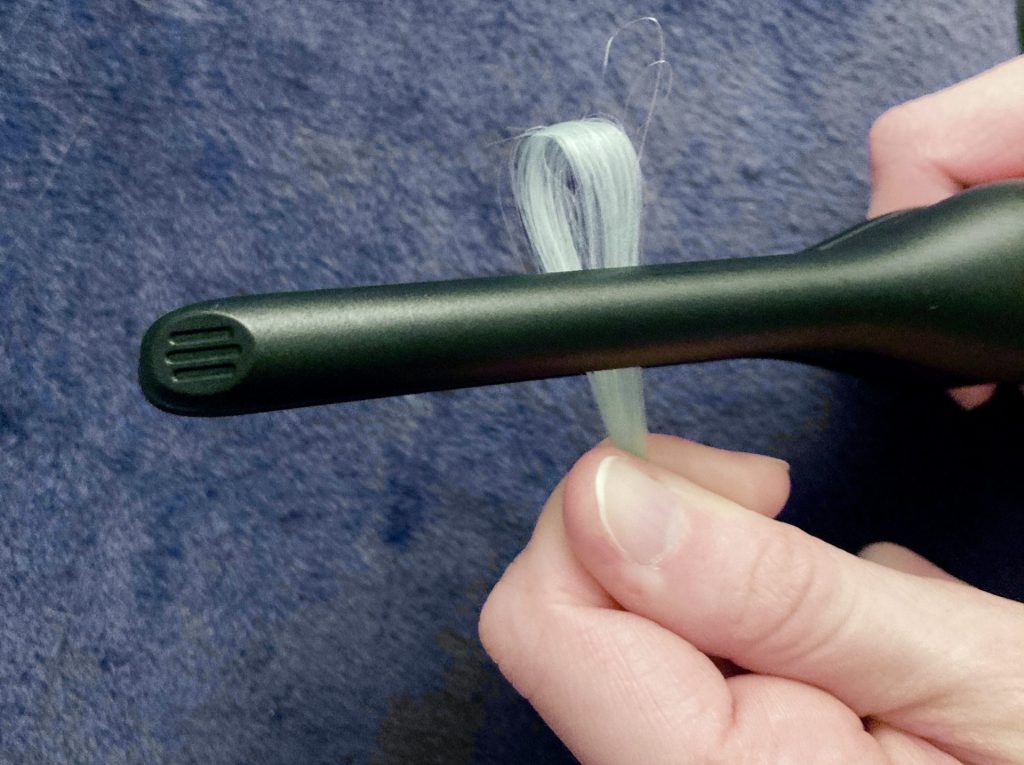
Now, nylon hair resists bending, so I found I had to create a kink in the fibers using a flat iron in order to pull them through the tail. Find the middle point of the hair, and, using a small amount as a time, fold the hair and iron over it to create a distinctive bend.
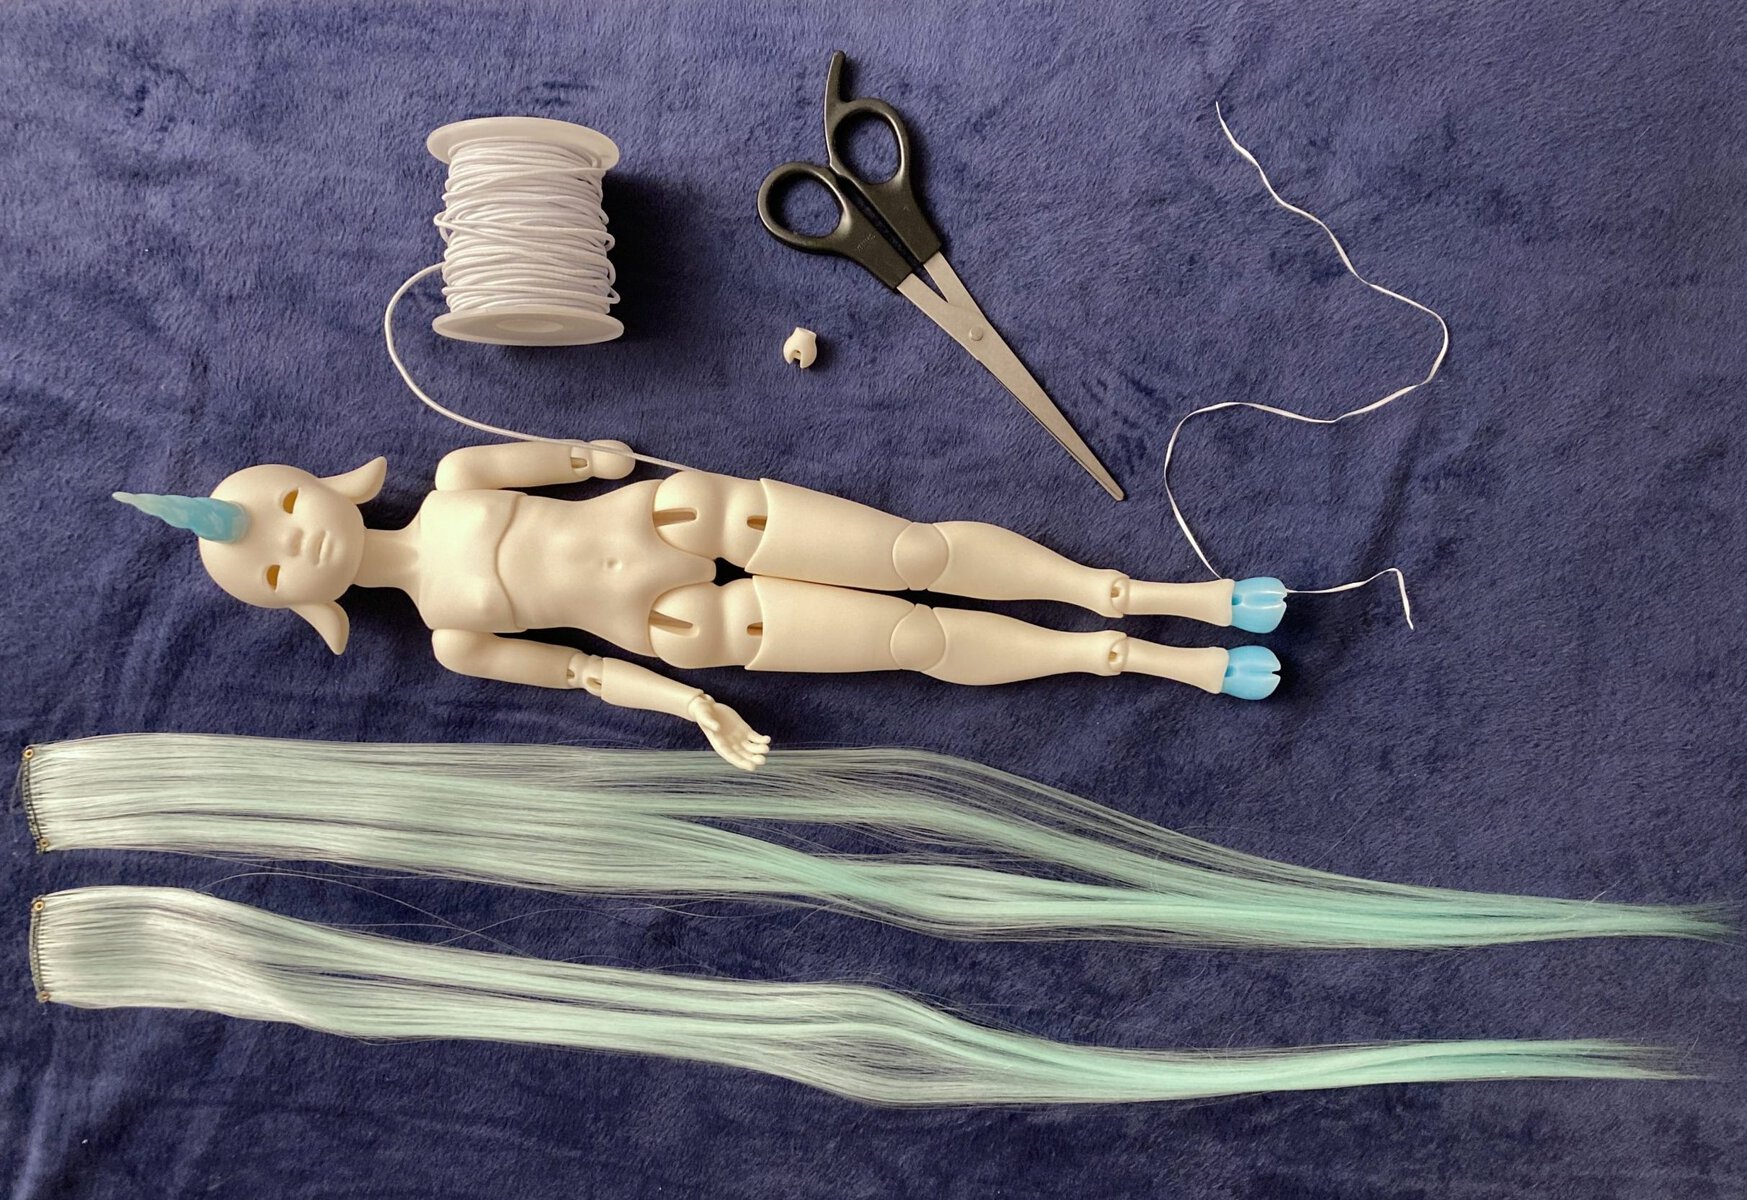
Step 3: Attaching The Hair to The Tail Piece
Once you finish with that, you have to set aside the amount of hair that you’ll need for the tail. This is hard to estimate, so you might have to try a few times to get the amount of hair that fits snugly without requiring you to break your fingers (or the tail) to get it all through.
The rest of this should be done after you have strung the elastic through the tail piece. I opted not to do this to ensure I could get clear pictures without any distractions, but it is much easier to get the elastic through if you do it at this stage.
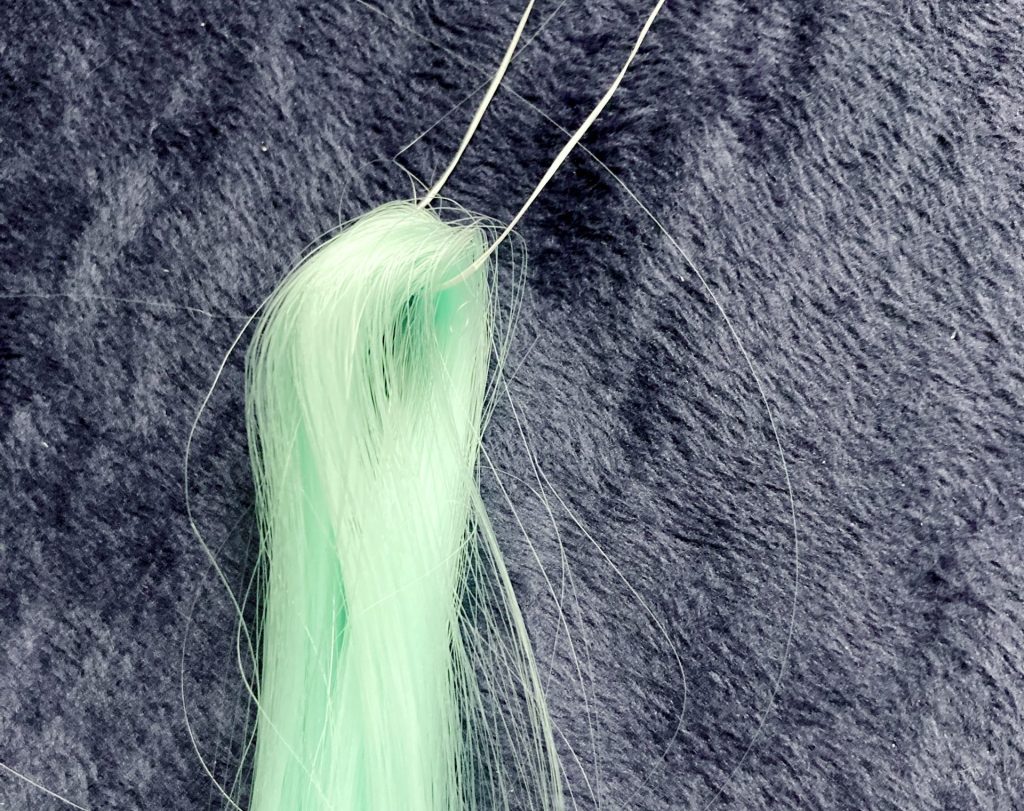
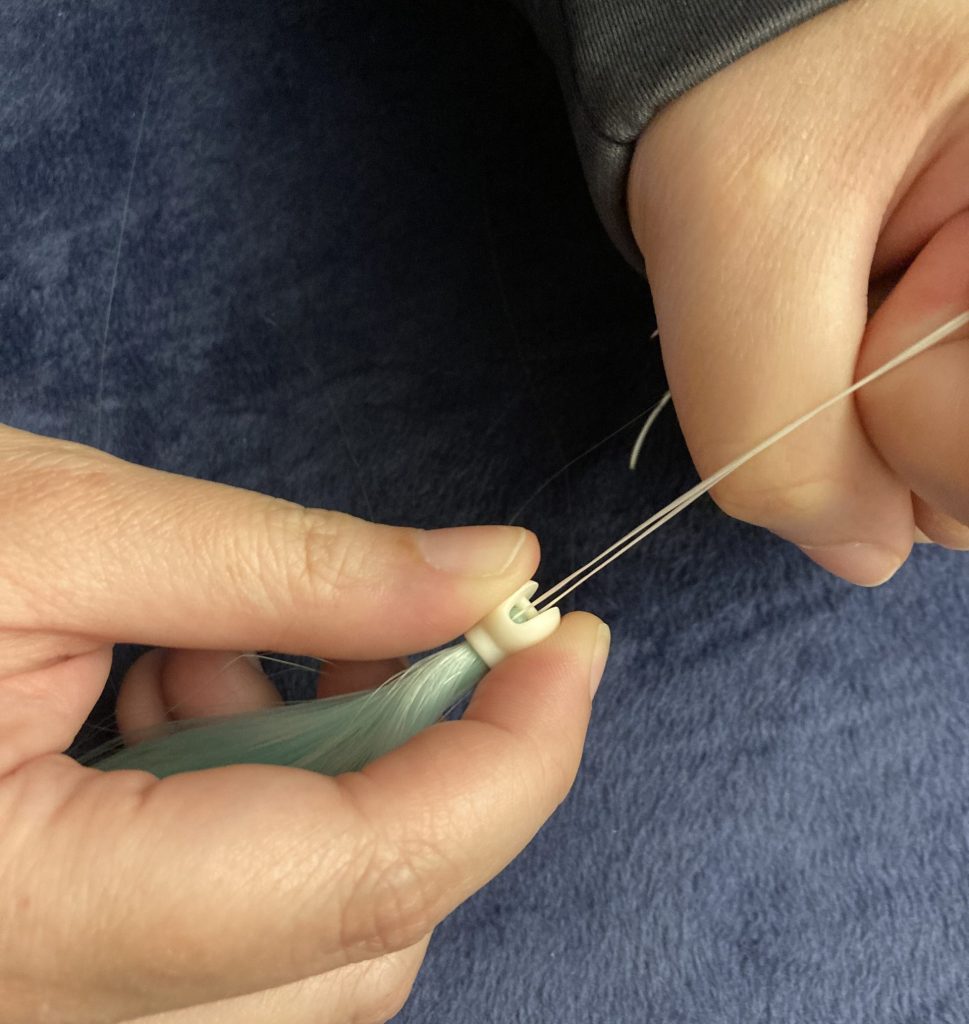
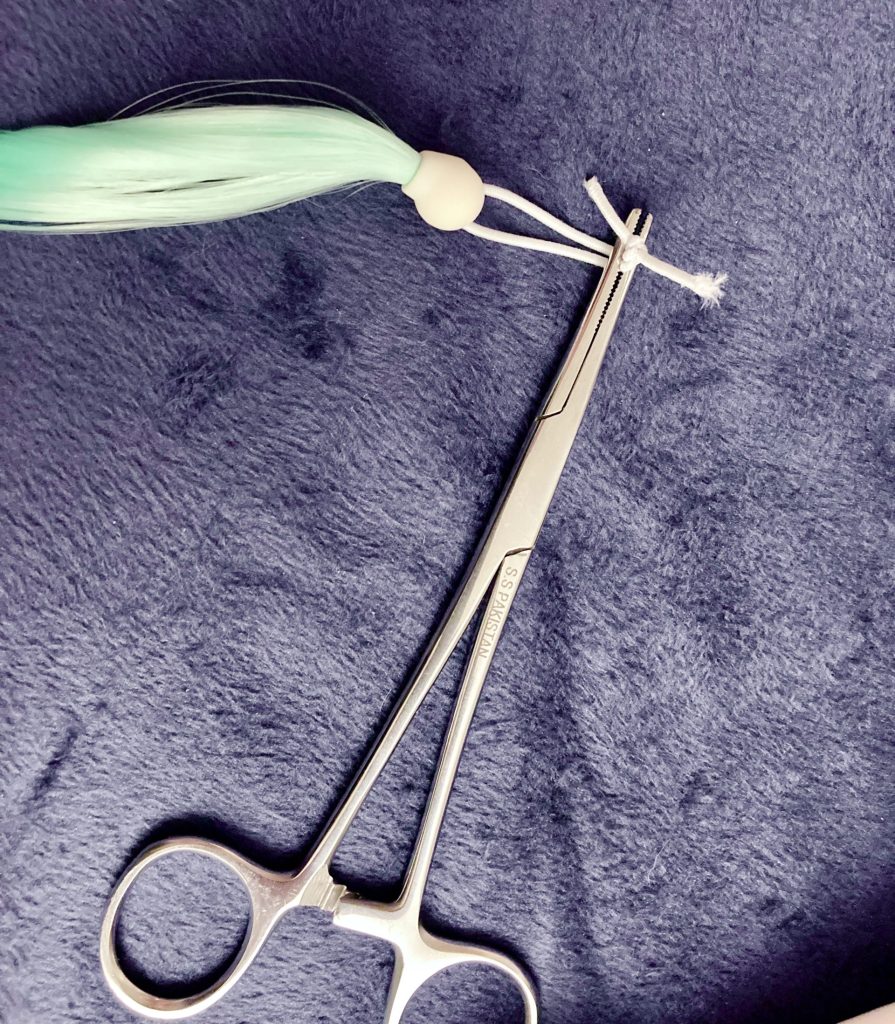
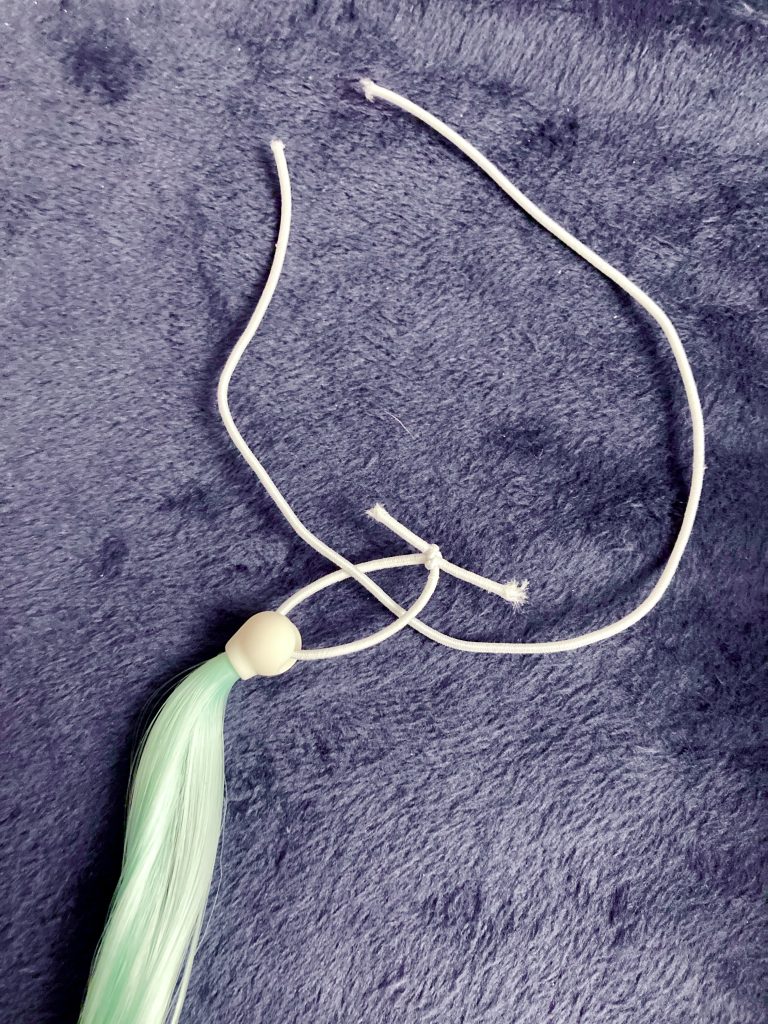
Then, take a piece of dental floss or fishing line. You’ll need a material that is as thin as possible and not easily broken. Loop this around the hair, right where the bend is.
Thread the floss through the tail piece, making sure you have the orientation correct.
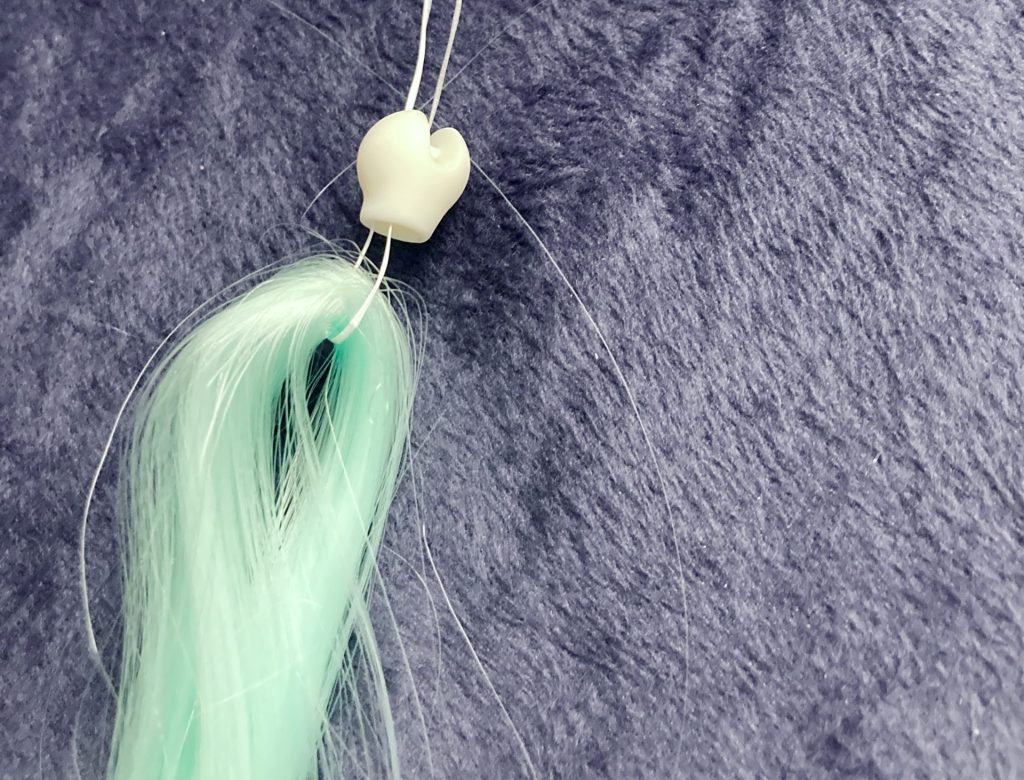
Make sure that each end of the floss is on opposite sides of the bar in the tail piece.
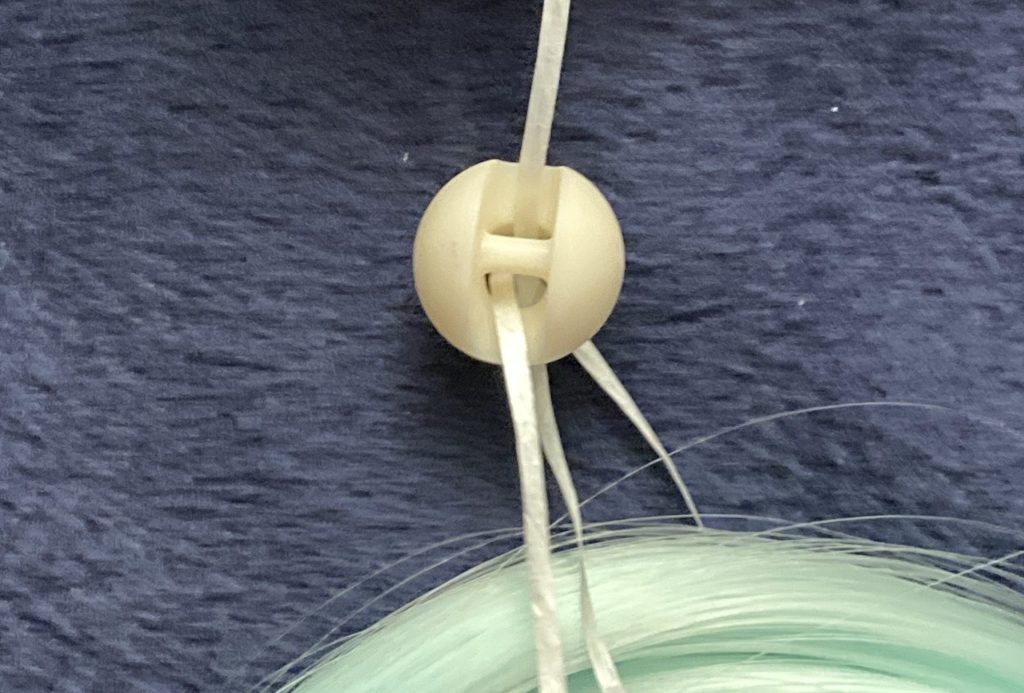
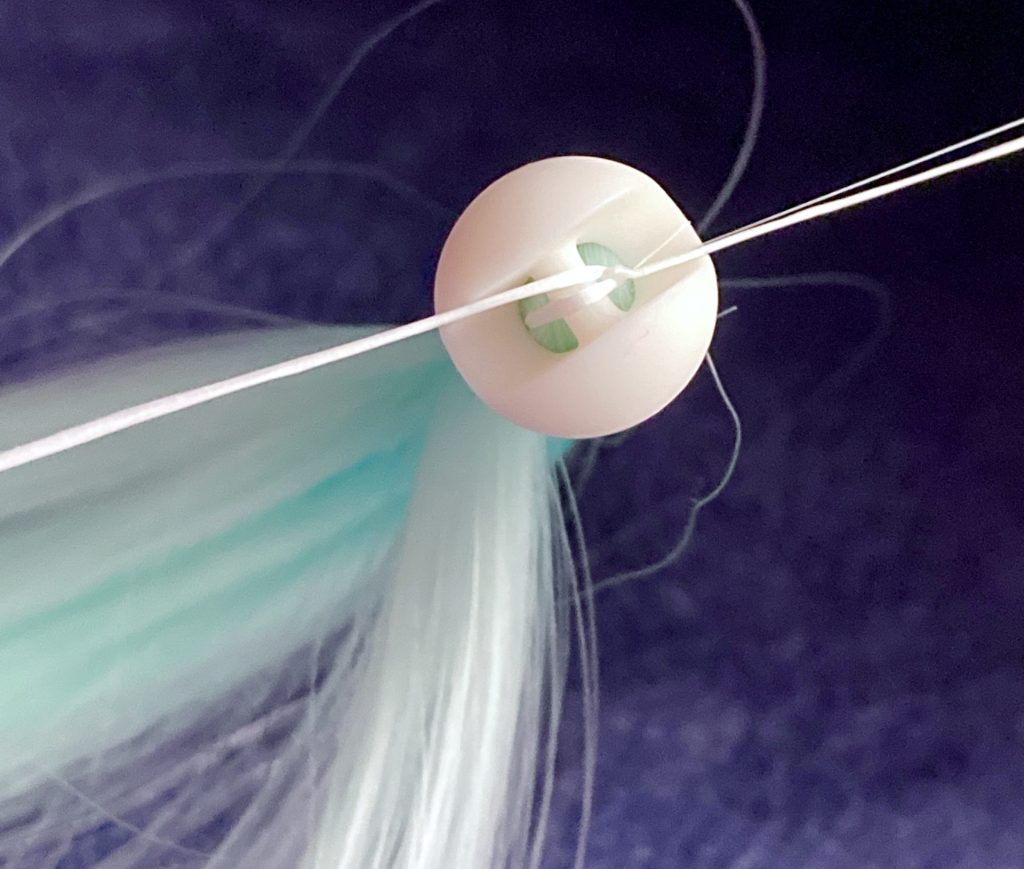
Now, it’s time to pull the hair through the tail piece using the floss. This will require quite a bit of force, but use your best judgement. If you have to pull so hard that you’re worried about snapping the floss, it is too much hair. Go back a few steps and remove some of the hair before trying again.
Once you know you have the right amount of hair, you can pull it out and apply a little bit of glue to the inside of the tail piece and between the fibers of the hair right where it bends, but this is optional. If you do this, please make sure the glue you use isn’t permanent. Opt for something like clear Elmer’s Glue, so if you make a mistake or change your mind later, you can soak the tail to soften the glue and get the hair out again.
Regardless of whether you apply glue or not, you’ll want to tie the excess floss around the bar in the tail piece.
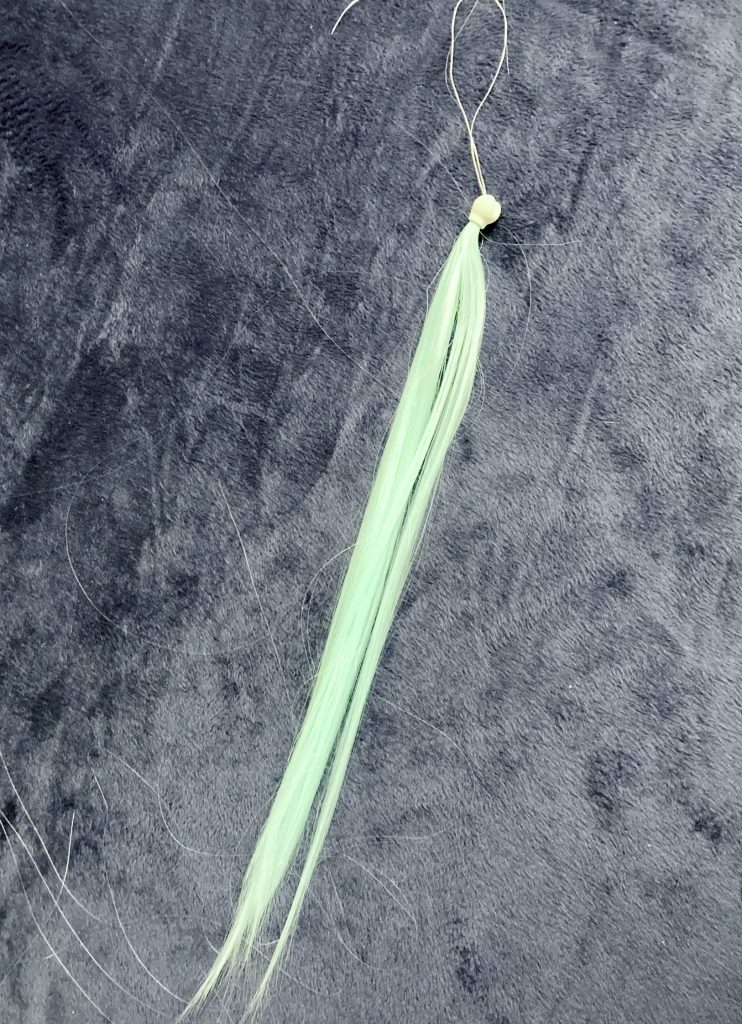
And that’s it for stringing the hair into the unicorn tail piece! If you used glue, make sure you give it time to dry before moving on to the next step.
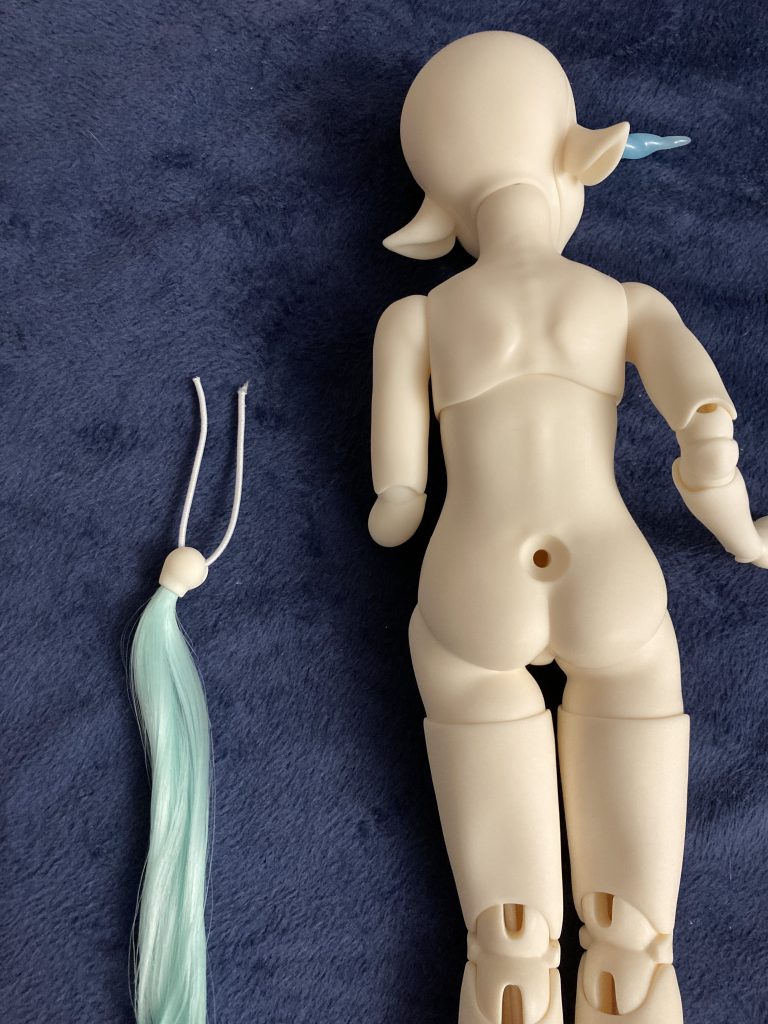
Step 4: Attaching The Tail to The Doll
To attach the tail to the doll’s body, you have to start by measuring out the amount of elastic you’ll need. It should be roughly the length of space between the hook in the back and the hole for the tail when loose. It should end up being the right tension after you tie the knot, so you don’t have to think too hard about this.
Thread that through the tail piece. If you’ve already strung on the hair, you might have to really jam the elastic in. Try using a toothpick to help move the hair aside and push the elastic through if it’s particularly tight.
Tie the elastic into a loop before doing anything else. I used forceps to make sure I could keep the knot exactly where I wanted it. Admittedly, I could have left myself a little more elastic to tie with, but eh… I managed.
Use a piece of scrap elastic to pull the tail elastic into the body. This is way easier if you unstring the top of the doll from the torso piece, otherwise the chest gets super in the way.
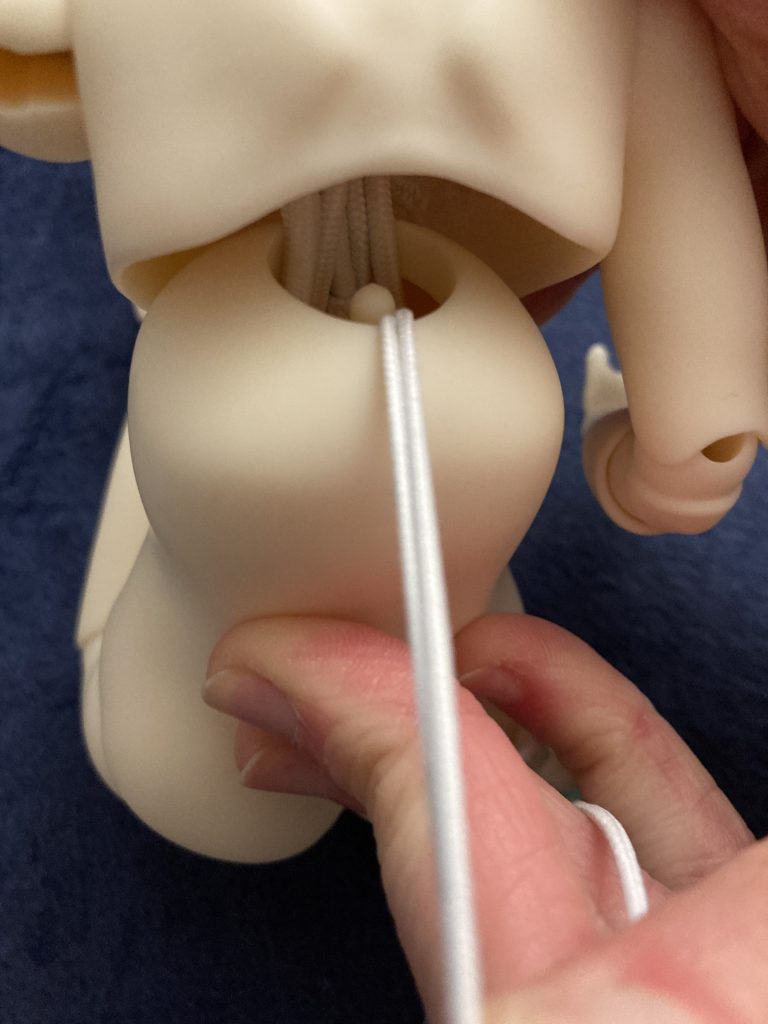
Using the scrap elastic to keep a good grip, pull the tail elastic up and around the hook at the top of the torso piece.

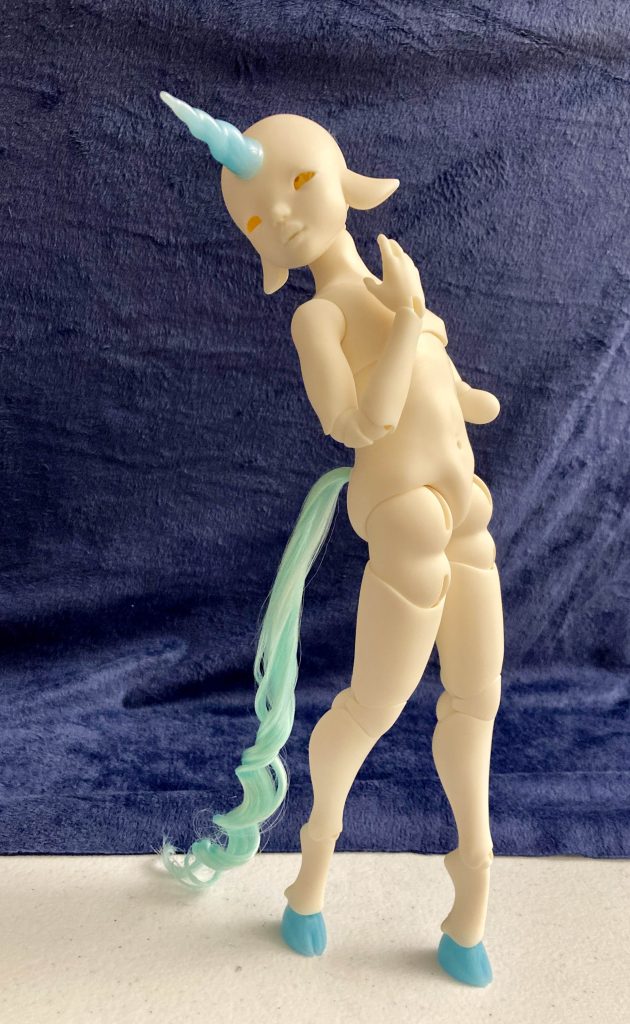
There you have it! I hope this helps!
If you have any other questions about stringing hair into the unicorn tail pieces, reach out to me on bluesky or instagram @VivifyDolls. I’ll do my best to help!~