How to String a BJD
Whether you’re restringing one of the dolls in your collection or putting together a Garage Kit, stringing a Ball-Jointed Doll (BJD) isn’t the easiest thing in the world. Every doll goes together a little differently, and things aren’t always intuitive. Fret not, though! Once you’ve done it a few times (or a few… hundred times… eugh…) it’ll become second-nature to you.
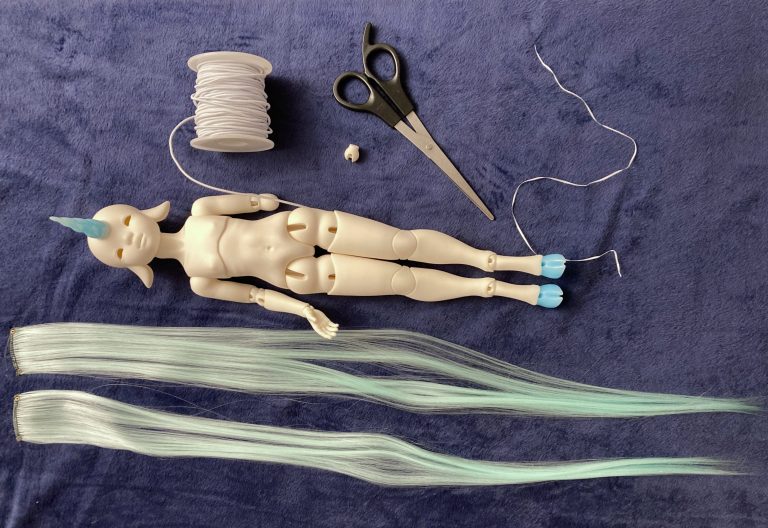
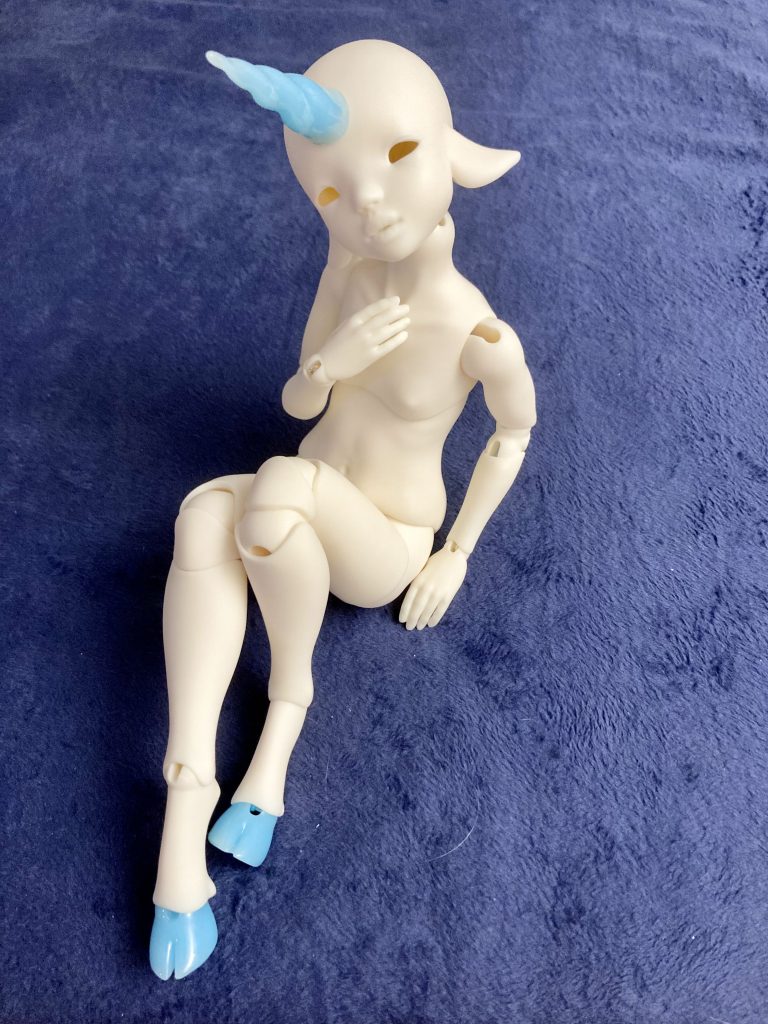
The doll featured in this tutorial is Vivify Dolls Anika on the Dancer Body (Unicorn Variant).
How Elastic Holds a BJD Together
Dolls go together in many different ways! There isn’t necessarily a right and a wrong way to string BJDs in general, but there may be a right and a wrong way to string a specific BJD. You should always refer to the recommendations of the artist or company that produced the doll.
Here are some of the most common ways to string elastic through a BJD.

2 separate pieces of elastic.
One elastic holds the arms to the bust, looping from one wrist to the other. The other elastic connects the legs to the head, running from one ankle, up to the S-hook in the neck, and down through the other ankle.
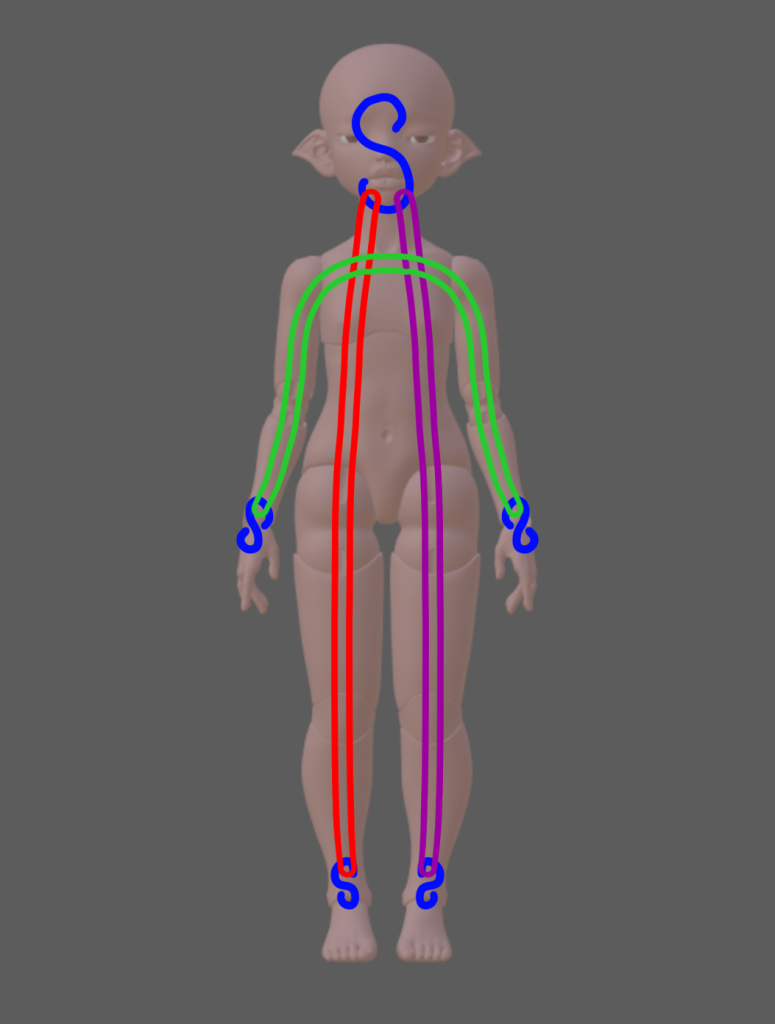
3 separate pieces of elastic.
Like the first one, the arms are strung together with one piece of elastic, but each of the legs has its own elastic that loops around the S-hook in the head.
This is my preferred method.
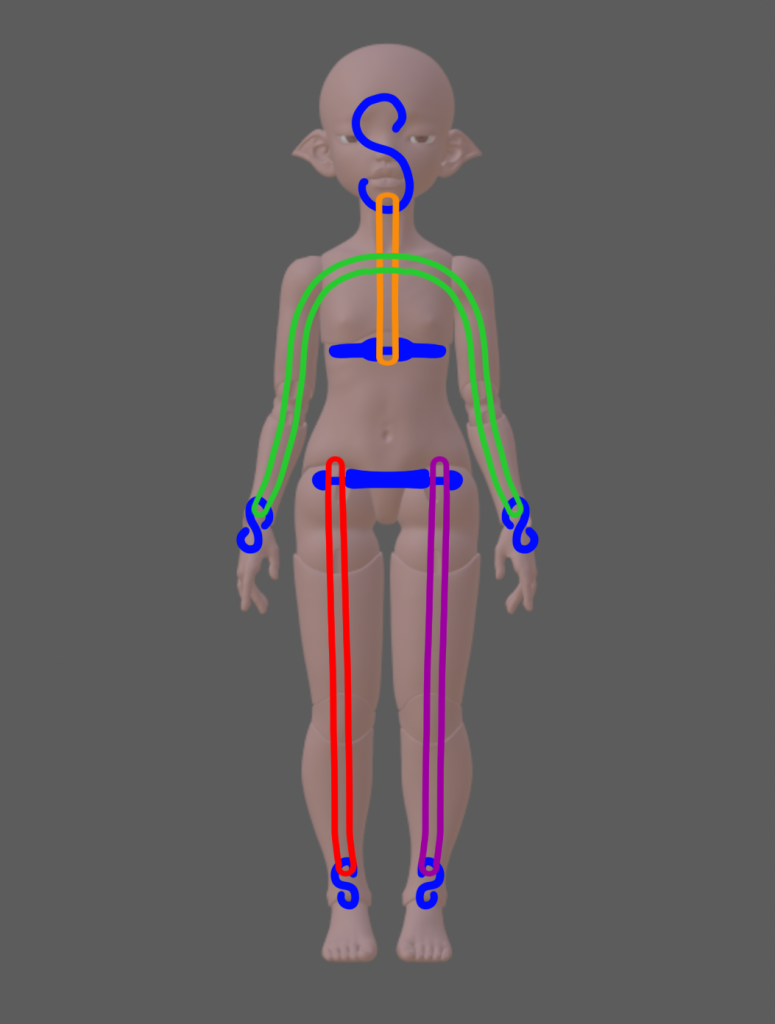
4 separate pieces of elastic.
The arms are strung the same way as before, but the legs are individually strung onto posts in the hip sockets. The last piece of elastic loops between the S-hook in the head and a post in the lowest torso piece.
Of course, the stringing technique will vary if the doll is not a standard shape. Centaurs, mermaids, and dolls with multiple arms may require a very specific method unlike those listed above. If you are ever unsure how to string a doll from an artist or company, it is always better to reach out to them for instructions!
Choosing the Right Elastic
If you’re putting together a Garage Kit BJD, you’ll probably have been provided elastic at the correct size. However, if you’re restringing a doll with old, frayed, or snapped elastic, or if you’re putting together a prototype doll, you might not know what you need.
The type of elastic used in stringing BJDs is round with a braided cover. It is sometimes called “stretch cord” or simply “elastic cord.” However, not all stretch cord is created equal. You need the elastic to be able to stretch well, but it has to be sturdy. If the elastic stretches without much resistance, it’ll result in a floppy doll.
As for what size to use, the best elastic for a doll is generally the biggest elastic that will fit in the channels. A nice tight fit with a thick elastic will ensure the doll is stable and will pose better without getting “kicky.” A doll that is “kicky” is one that will curl their limbs up or kick them out aggressively, whichever results in the least tension on their elastic. Though many things can cause a doll to behave like this, using the wrong elastic is a surefire way of getting even the best dolls to act up. (Don’t force it though! If the elastic has to be jammed into each part, it’s probably overkill.)
It’s not uncommon for a doll to require two different sizes of elastic. The holes in the arms can be thinner than those in the legs, and therefore would require a thinner elastic.
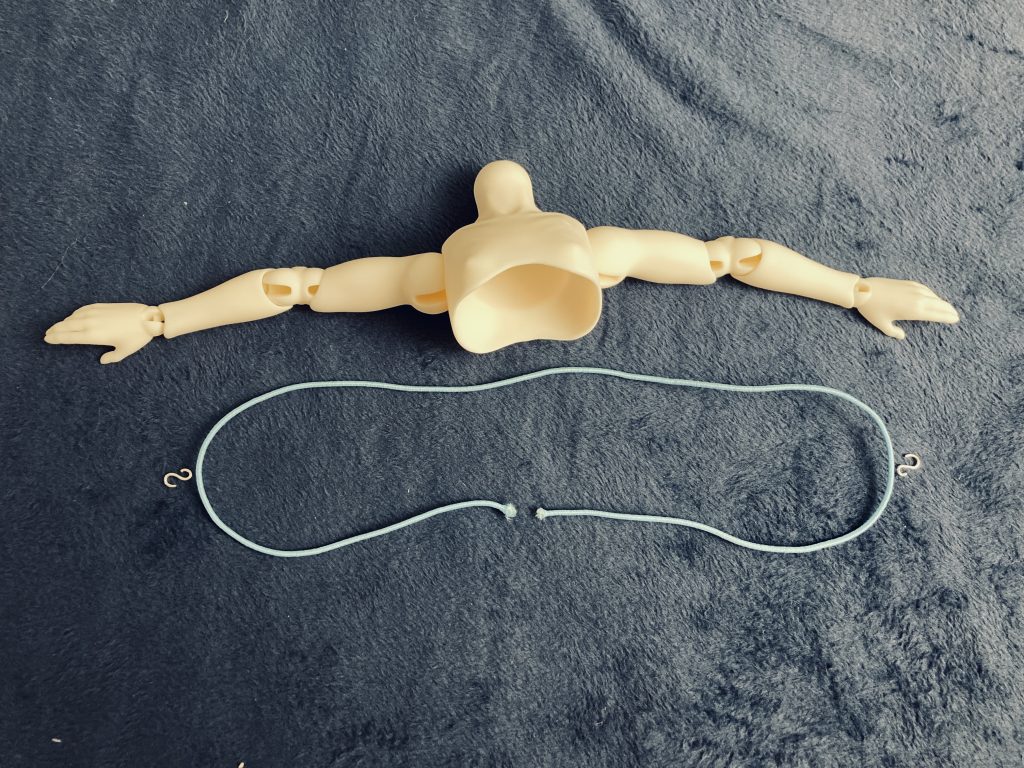
Stringing a BJD
A note about the following tutorial: Since the doll I was stringing is off-white, I used a bright blue elastic for better contrast. Using traditional white elastic made it harder to follow along since the doll and the elastic were almost the same color. Because of this, however, I had to use the incorrect size elastic–this doll takes 2-2.5mm elastic, while the blue elastic I had on hand is only 1.5. All the techniques demonstrated in the article will still work using the correct elastic (and I did restring her with the correct size after getting these pictures).
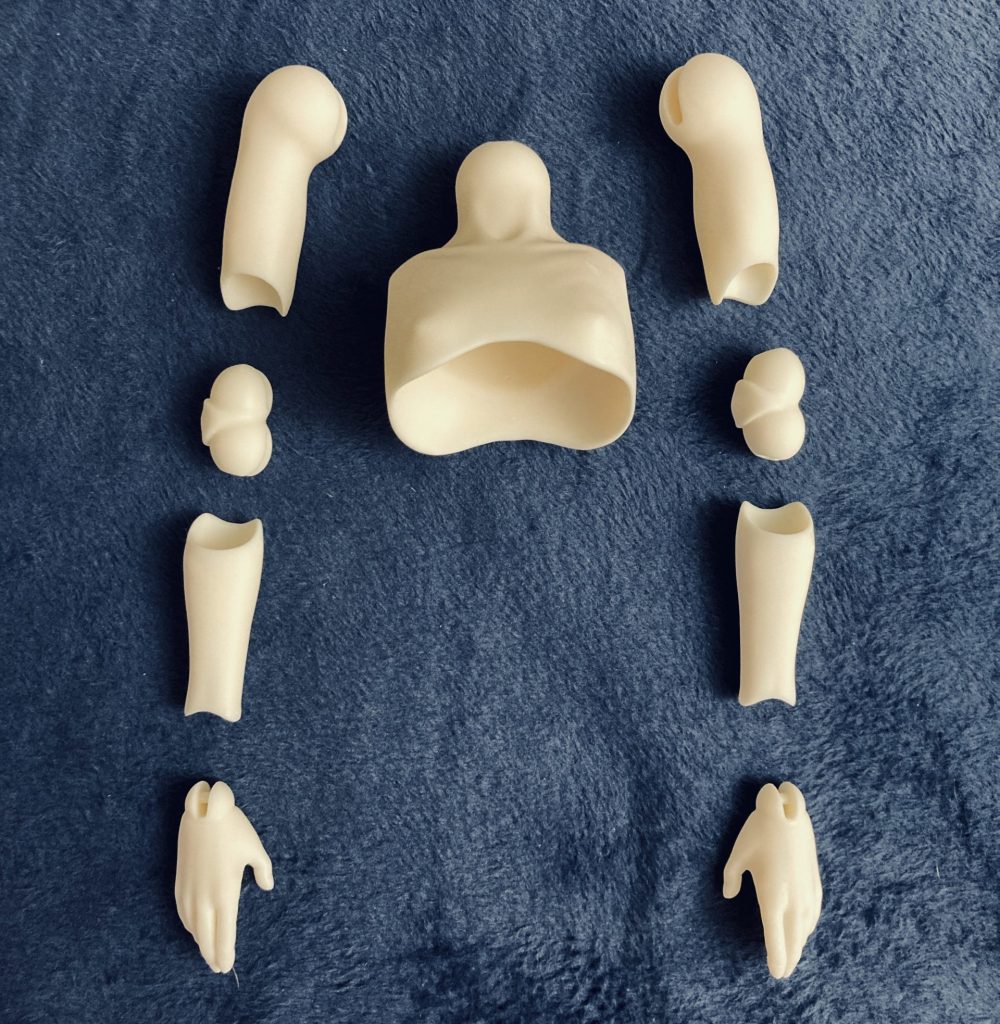
You Will Need…
- Elastic
- Hooks
- Scissors
- Locking Forceps
- Scrap elastic, yarn, dental floss, etc.
- Pointed Tweezers
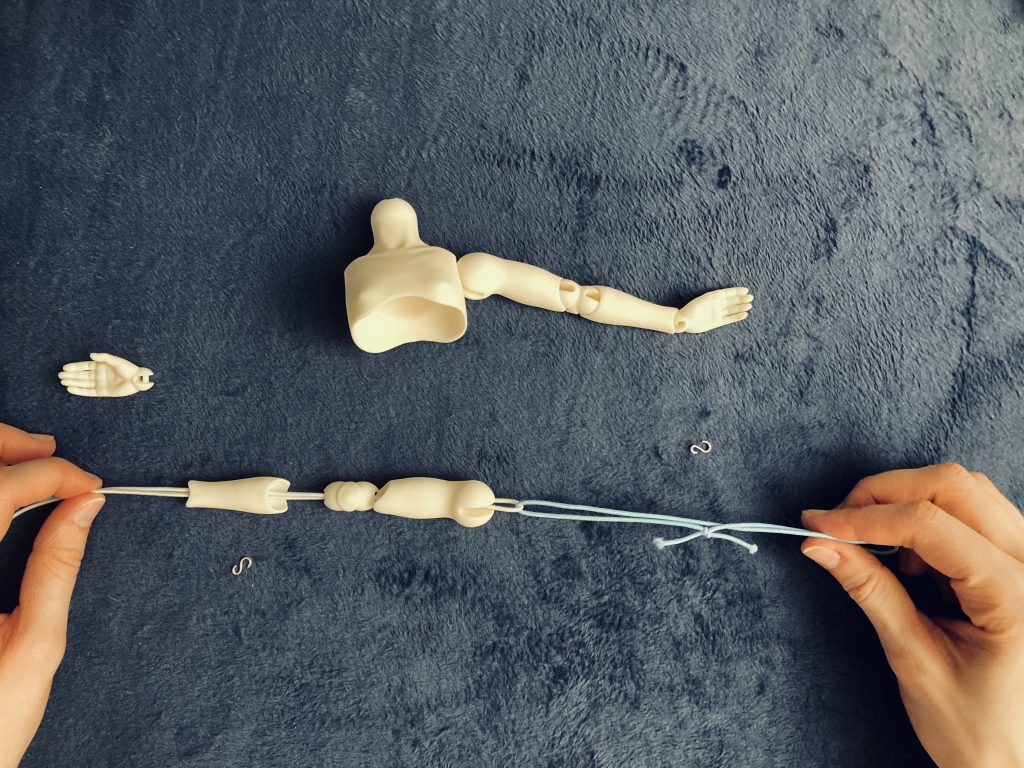
Stringing the Arms to the Chest (Method 1)
This technique uses forceps, and it is ideal for when you have to string the elastic through the wrists without s-hooks, such as with dolls that are too small for hooks or those that use magnets instead for changing out different hand shapes.

First, you’ll want to measure out the amount of elastic you will need. Lay the elastic down without tension and measure out a piece that is about twice the length of the arms from wrist to wrist and add an extra inch before you cut it–that will make your life easier later, when you have to tie the knot.
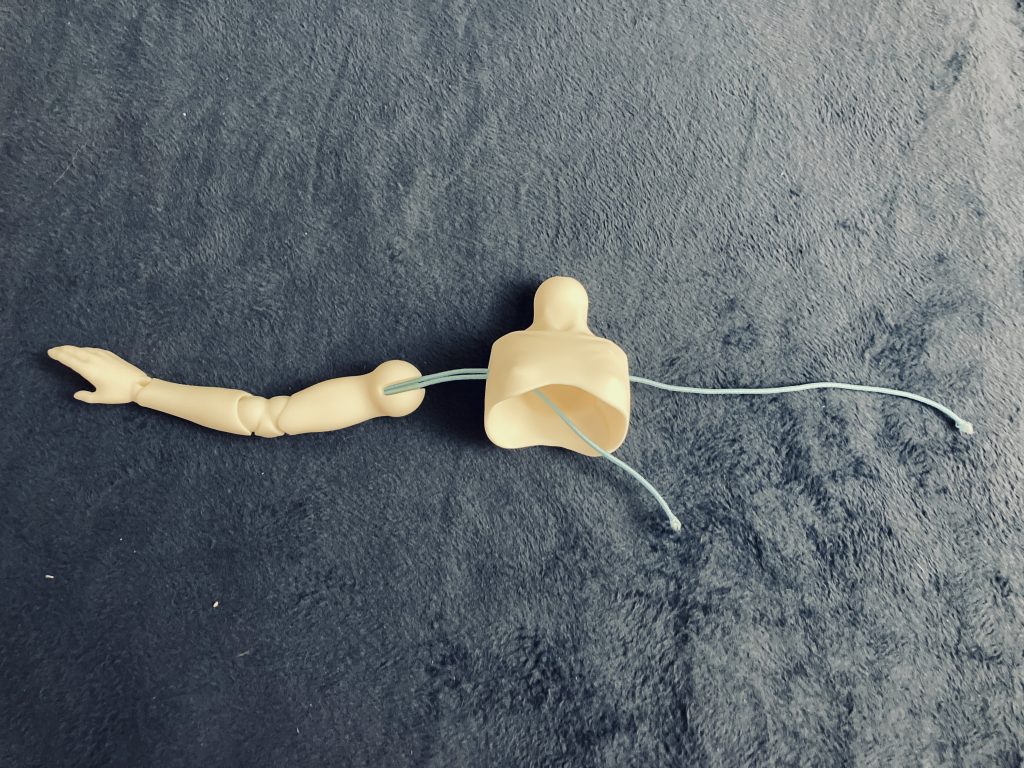
Once you have your elastic cut, you’ll want to thread on one of the hands (with or without the s-hook). Then, take BOTH ends of elastic and string them through the rest of the arm. Make sure the elbow is oriented the correct direction!
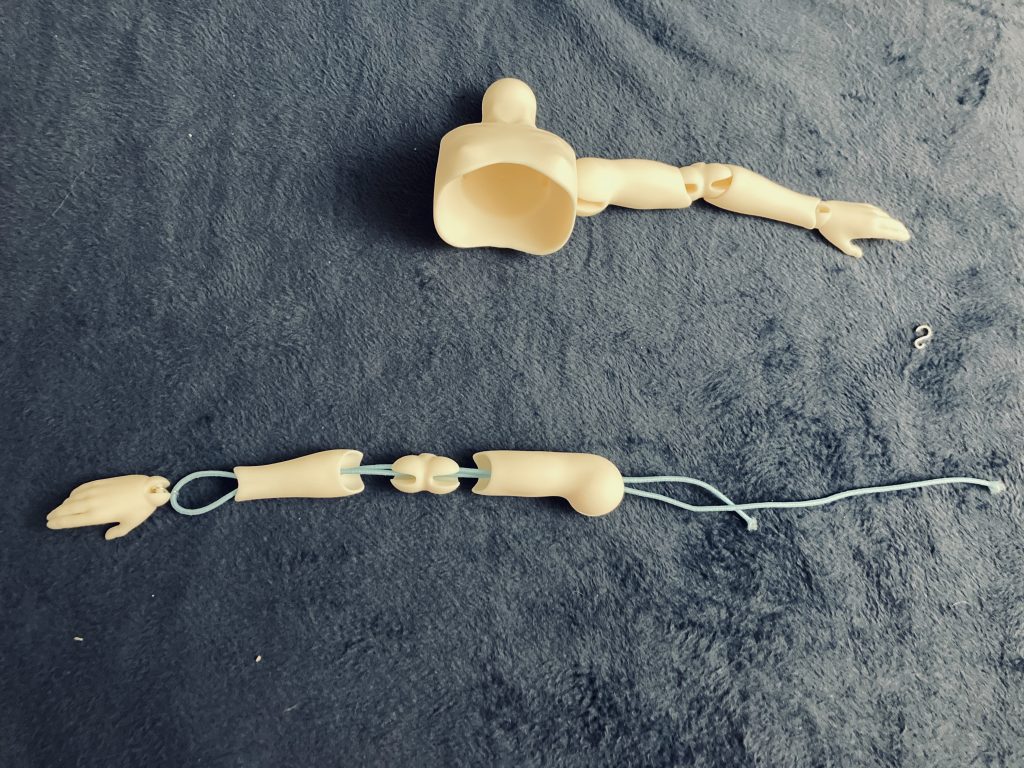
Notice that one end of my elastic is longer than the other! Take a moment to adjust the two pieces of elastic sticking out of the top of the arm so you also have one long and one short piece. Then, when you string the elastic through the body, thread the longer piece all the way through the doll and out the other arm socket. Take the shorter piece, and push it into the center of the chest piece and down towards where the belly would go.
You can use the forceps to hold the shorter piece if you need to keep it from slipping.
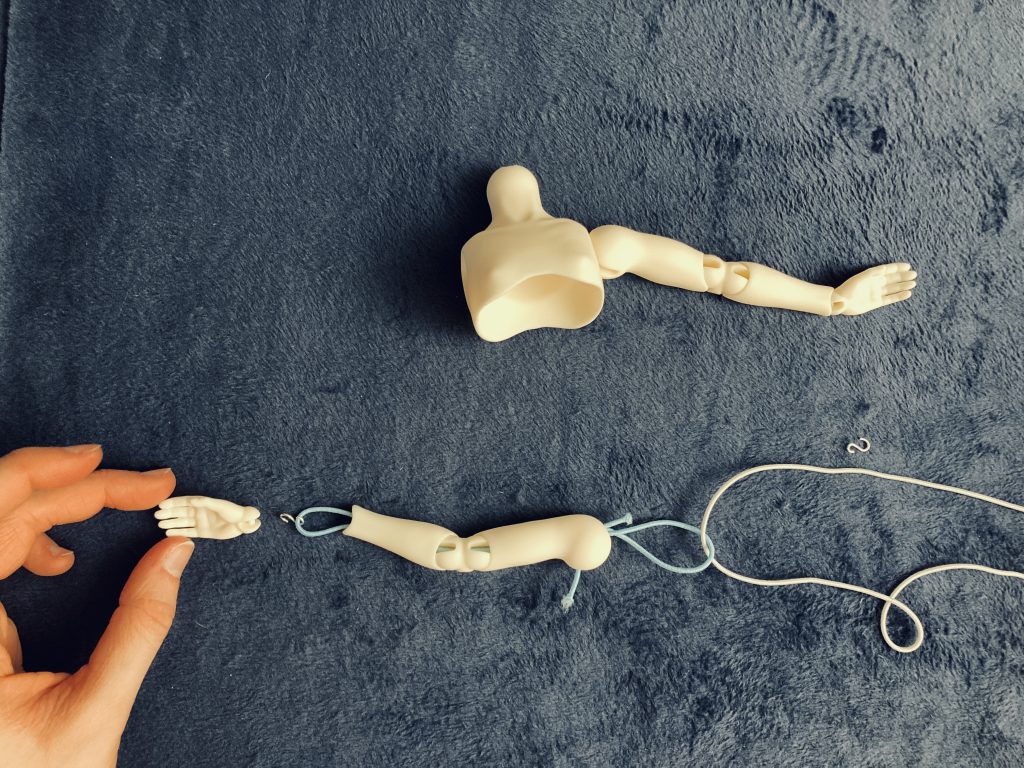
Now, you can string the other arm onto the longer piece of elastic!
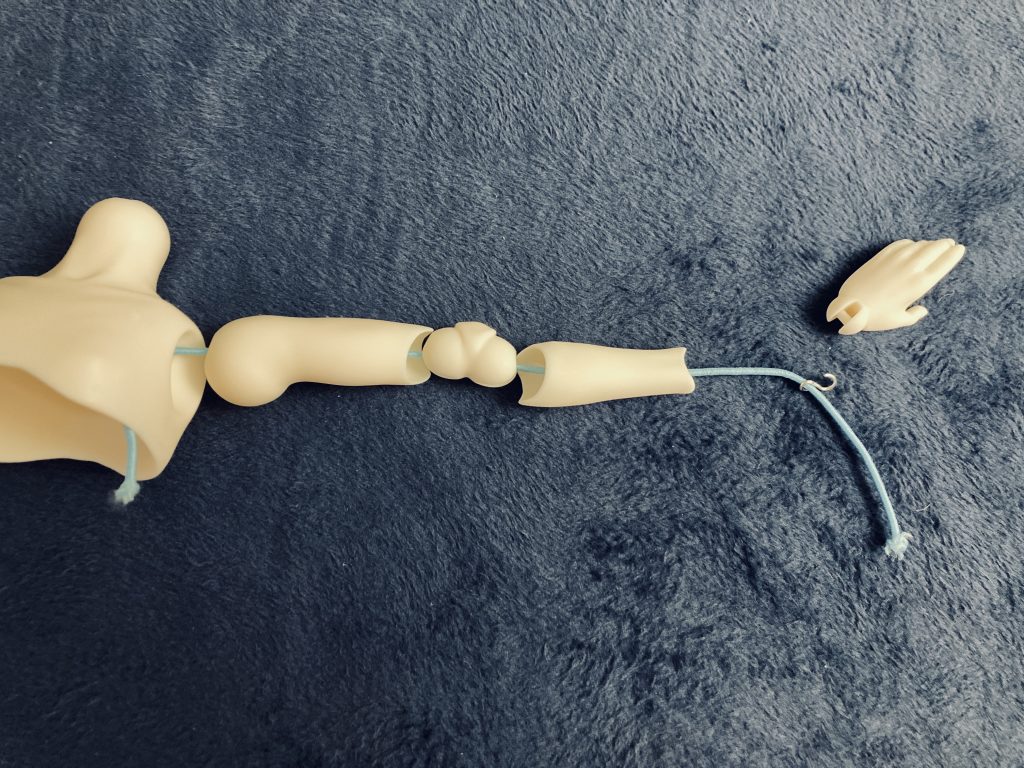
You’ve probably noticed that you only strung one piece through this arm. You’ll have to loop the end of it around the other hand (or s-hook) and then feed it back through the arm towards the chest. This part is a little more challenging, but having more elastic than you need can make this a bit easier by giving you something more to hold onto.
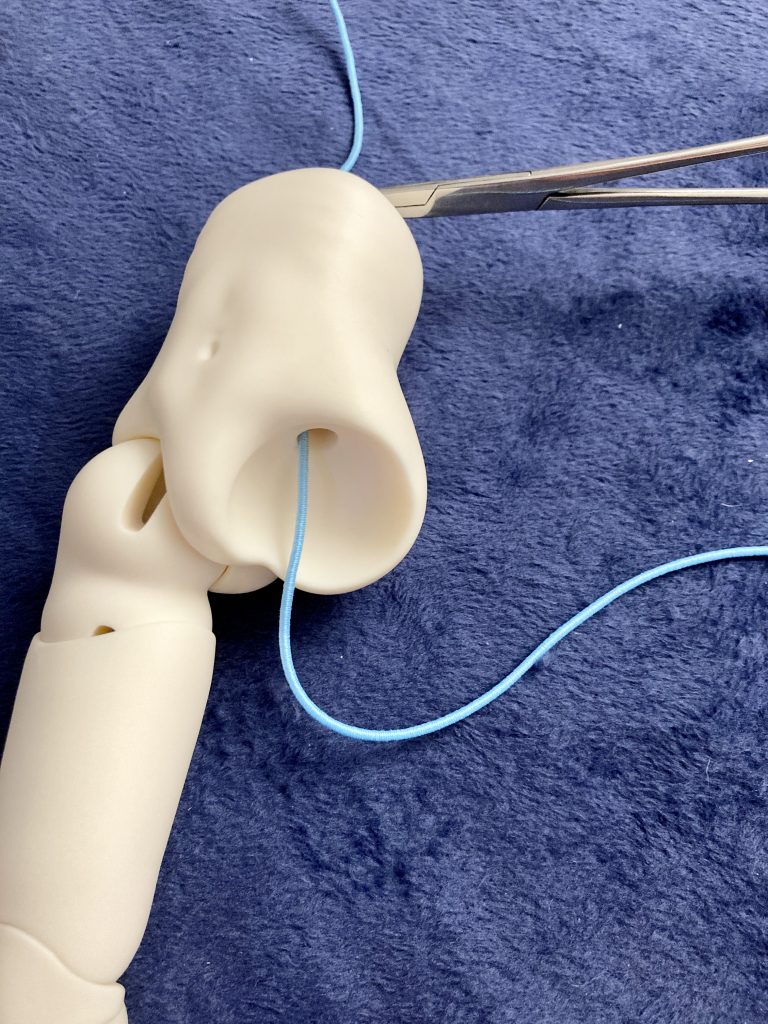
Once you’ve pushed the elastic back into the chest, make sure it comes out the bottom to join the other piece of elastic!

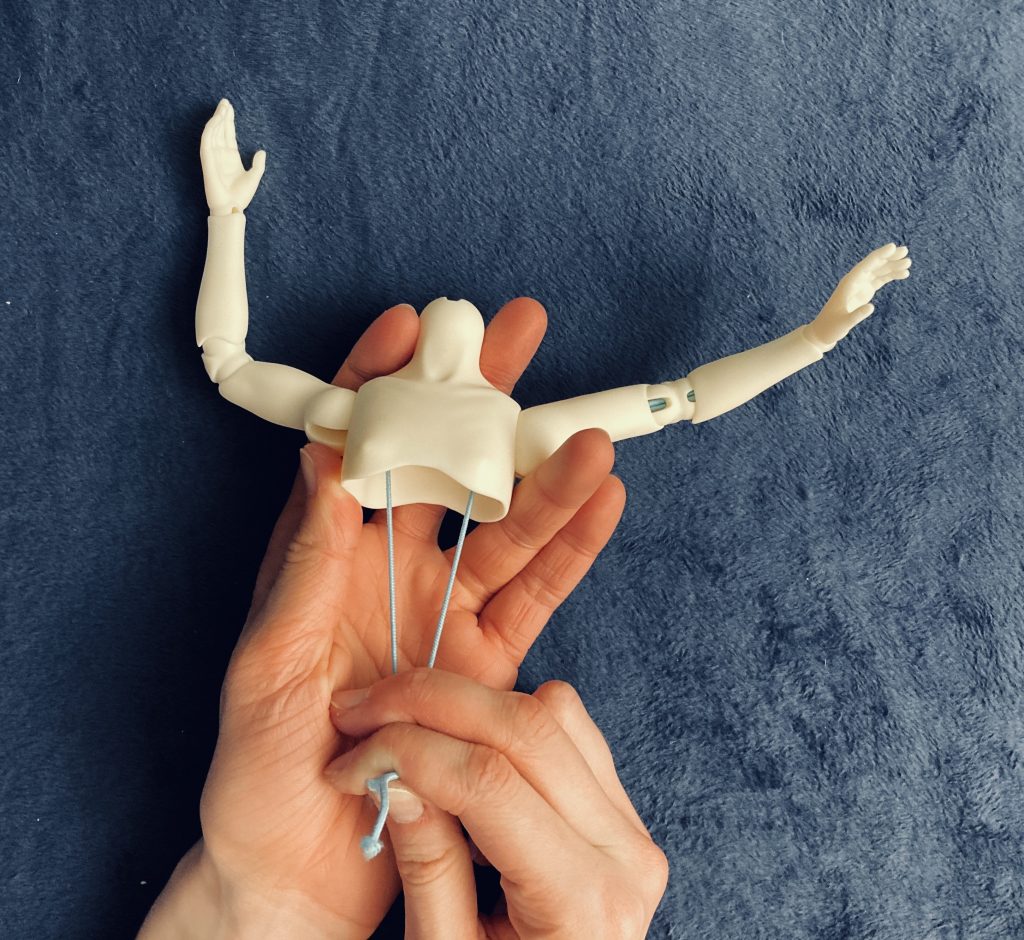
Tug on the elastic a bit to get it to the tension you want. You may have to pull on the arms a bit to get the elastic to have even tension throughout, otherwise one side of the elastic may be pulled tight while the other part is too loose.

Once you have the tension you want, apply the forceps to hold them at that tension. You don’t want the arms too tight, but they should be able to hold themselves up and out without issue. Some bigger dolls will struggle with that a bit more though, so use your best judgement. Tighter is not always better.
Now, it’s time to tie the knot, but don’t worry! It isn’t anything complicated. The simplest knot you can use is the square knot, which starts the same way you would tie your shoes. Pull the left side over and under the other elastic, and then repeat the motion with the right side. If you do not alternate sides, you’ll end up with a granny knot, which isn’t as secure of a knot.

Make sure the knot is tied right up against the forceps, so the tension will stay about the same. Then, remove the forceps, trim the excess elastic, and voila! The arms are strung.

Stringing the Arms to the Chest (Method 2)
This next method is much more efficient than the first method, but it is a little less beginner-friendly and it requires that the doll uses s-hooks in the wrists. Dolls that are too small for hooks or those that use magnets instead of hooks cannot use this technique.
This method involves tying the loop of elastic before stringing it through the arms.

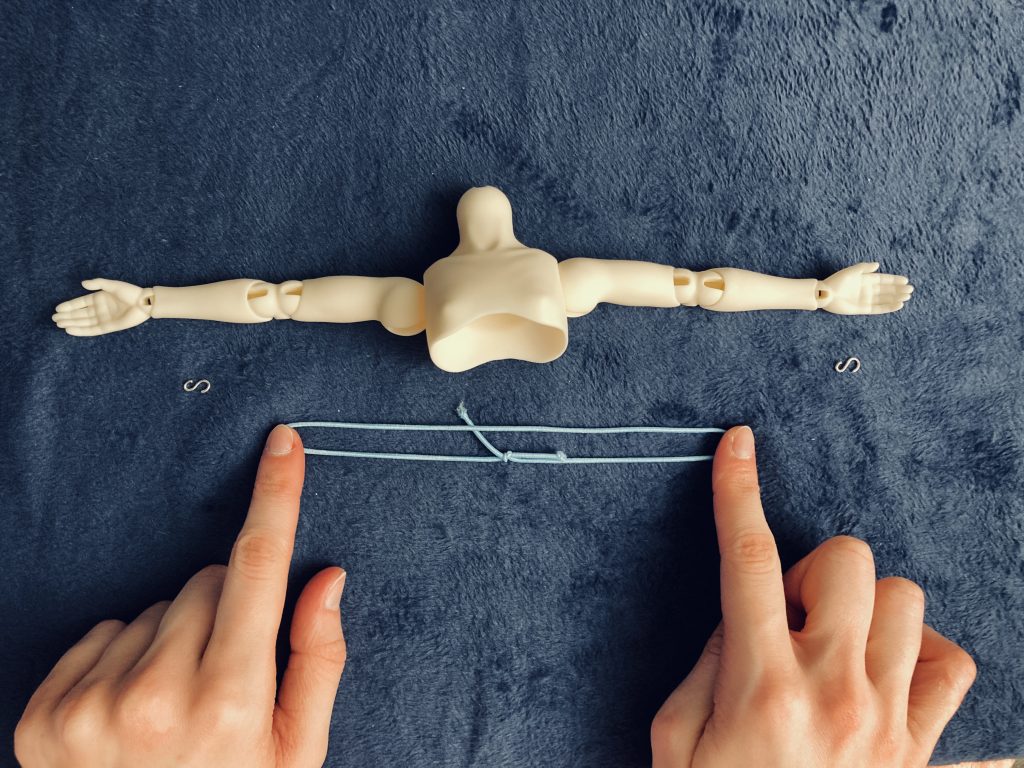
Start by measuring out the elastic you will need. Instead of leaving the elastic loose during this phase, pull it taut and hold it up between the wrists. You want to get the tension right at this point, so having an understanding of what is a good tension for a doll is pretty important.
Add a little extra space for the knot, cut the elastic, and then tie the ends together using a square knot.
Then, you will need to grab a spare piece of elastic (or string, thin wire, stiff yarn, etc) to help you string this through the arm. Loop that extra elastic through the hoop and use it to pull it through the arm pieces.
Once you get the elastic pulled through, loop the s-hook around the exposed elastic in the wrist and add the hand. If the knot is small enough to move through the channels in the arm (which, if you’re using the right sized elastic, it shouldn’t be) you can start in the wrist instead and pull the entire elastic through.
String your spare string or elastic (or whatever) through the opposite side of the loop now and use it to pull your elastic loop through the body and out the other arm socket. Take a moment to ensure the knot is in the middle of the chest before moving on!

Thread on the other arm pieces and pull the elastic through, securing it with the s-hook and hand.

Then, hold the doll by the hands and give them a gentle tug to allow the elastic to even itself out. Adjust the knot if need be, and then you’re done!
Stringing the Rest of the Doll (Method 1)
This method uses a single piece of elastic through the rest of the body, looping from one leg, up into the head, and down into the other leg. This is the most traditional method, and since it uses one single piece of elastic, it is much easier to get the two legs to have the same tension.
Start by measuring out the elastic you will need. Pull the elastic and measure out enough to span the length between the ankles and the neck four times. Don’t forget to include a little extra length for the knot before you cut the elastic.

Then, string on the leg the same way you strung the arm in Stringing the Arms to the Chest (Method 1).

Just like with the arms, you’ll want to pull one side of the elastic so it’s longer than the other side. Thread both elastic through the hole in the hip socket and through the top of the torso piece, pull to give it a little tension, and apply the forceps to hold both pieces in place. At this point, the leg should feel slightly looser than you want it, since it’ll get tighter when you pull the elastic through the head.

Then, take the longer end of the elastic, and thread it back down so it comes out the other hip socket.
String the other leg onto the elastic the same way you did with the arms.
I’m not using hooks for the hooves since there aren’t any other foot shapes to replace them with, but you can do this method with or without s-hooks.
Thread the elastic back up through the leg once it is secured to the ankle.

Thread that up through the torso piece to join the other end of the elastic, pull the leg to increase the tension, and apply another set of forceps to hold it in place. You could also use a stick or pencil or something to hold the original loop, just be careful not to drop it down into the center of the body.

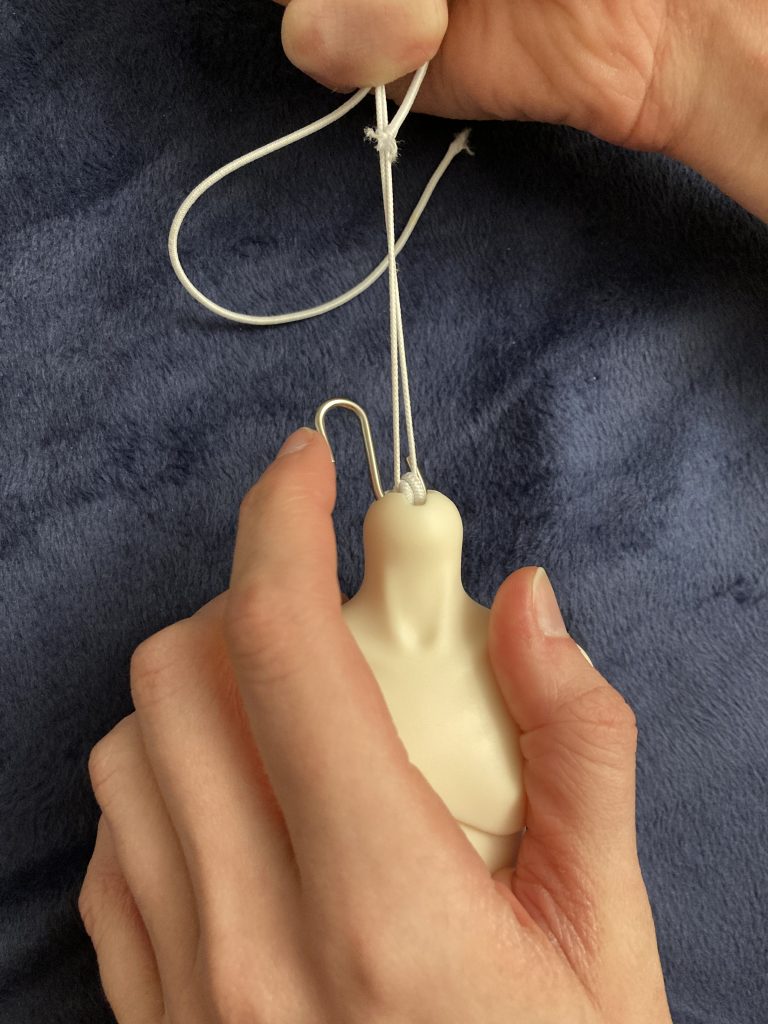
At this point, you tie the knot, using the same square knot as before. You should end up with the legs strung together, with a double loop of elastic coming out the top of the torso.

Pull the elastic up to about where the neck would be and test the legs. If the tension isn’t right, you can untie the knot and adjust it at this point. Make sure it is the way you want it before you trim the excess elastic.
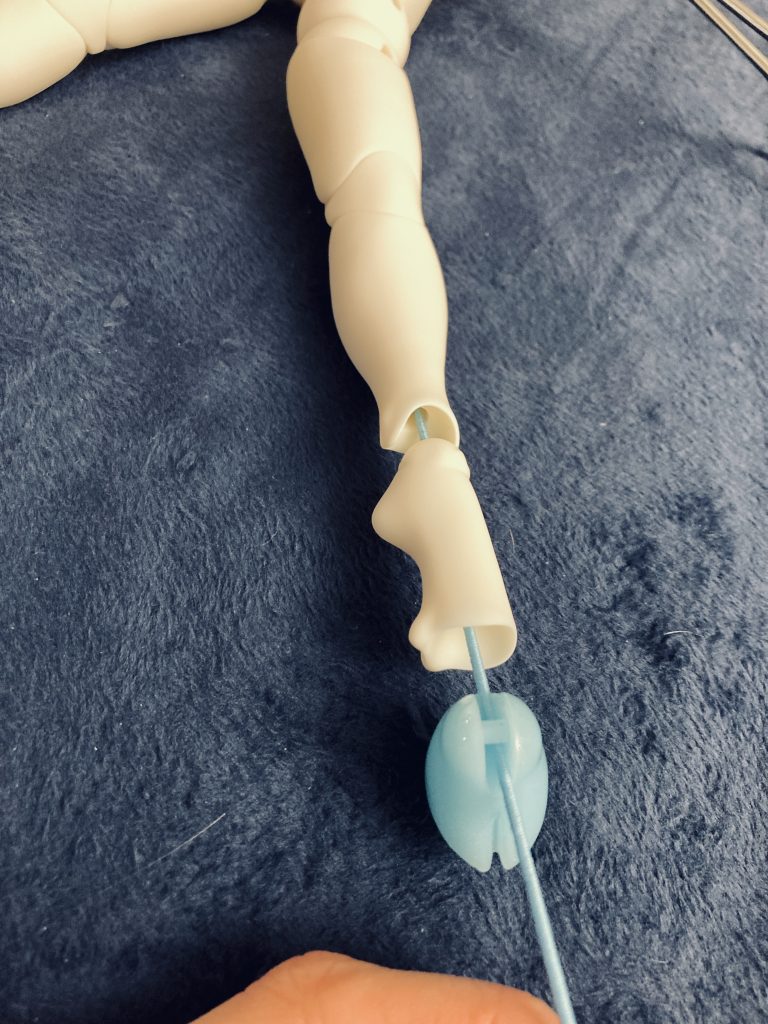
Next, you’ll want to thread some spare elastic through the loops to help you pull it up into the neck.
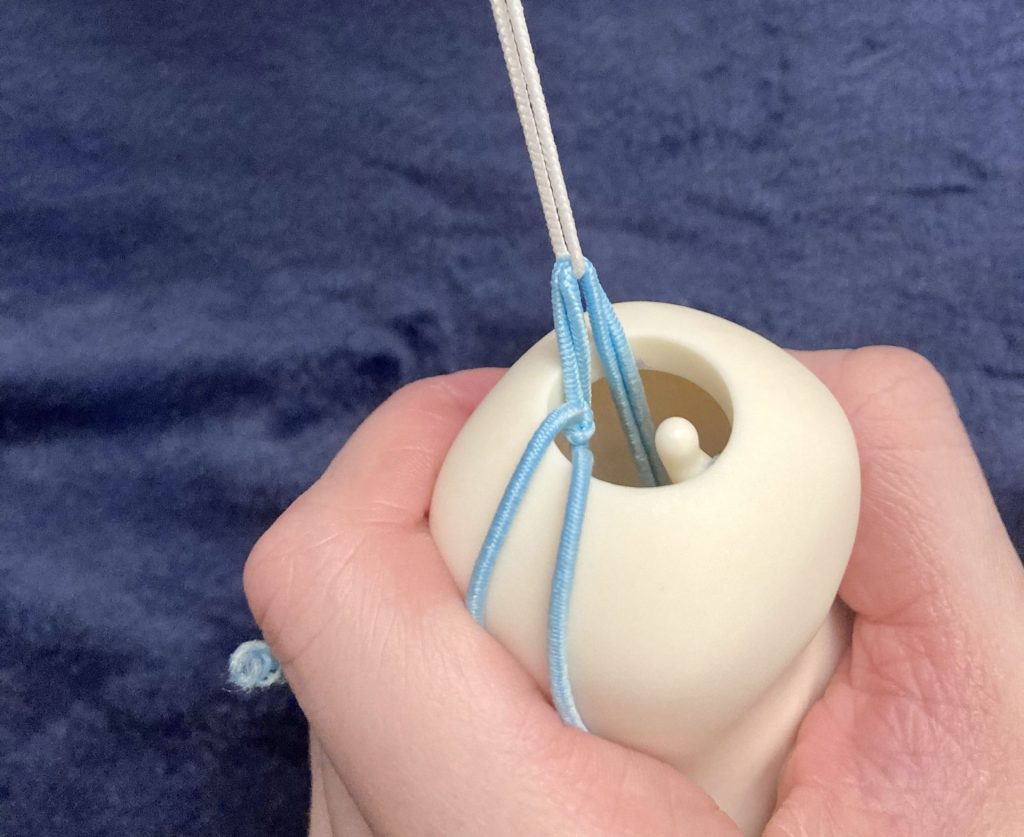
Thread the spare elastic up through the neck of the doll to connect the top and bottom of the doll.

Use that spare elastic to pull the loops up through the neck and safely around the head’s s-hook.

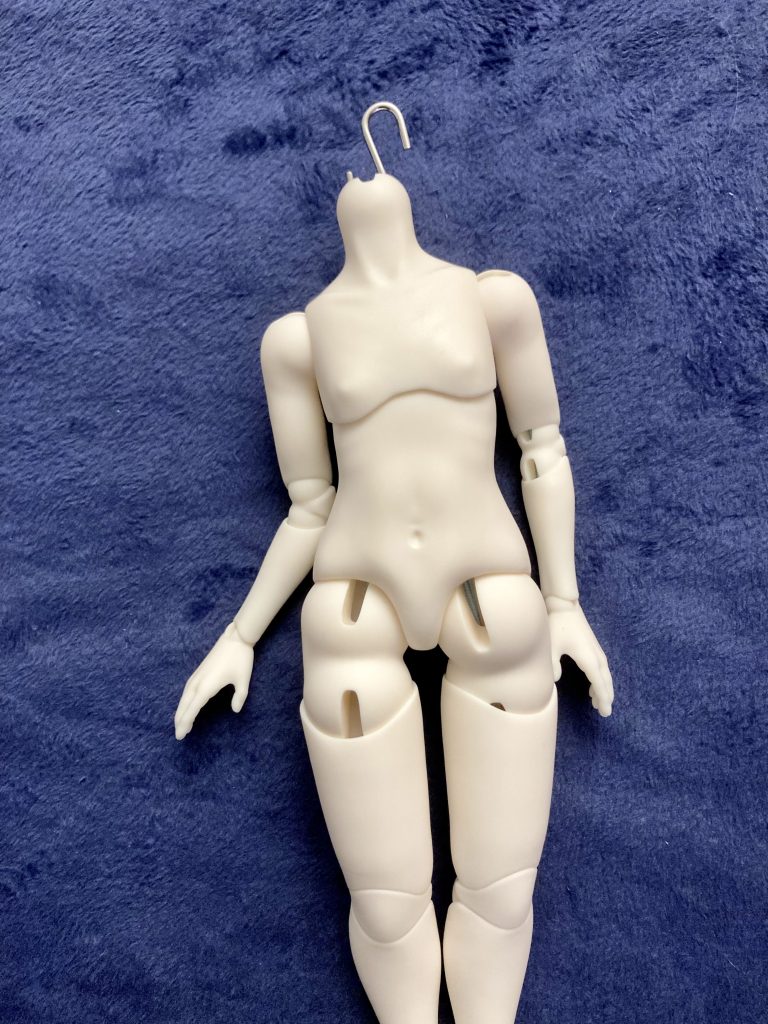
Pop on the head, and just like that, you’re done! You can tug on the doll’s limbs to try to even out the elastic if it needs it, but aside from that, your doll is together!

If that method isn’t straightforward enough, you can try method 2.
Stringing the Rest of the Doll (Method 2)
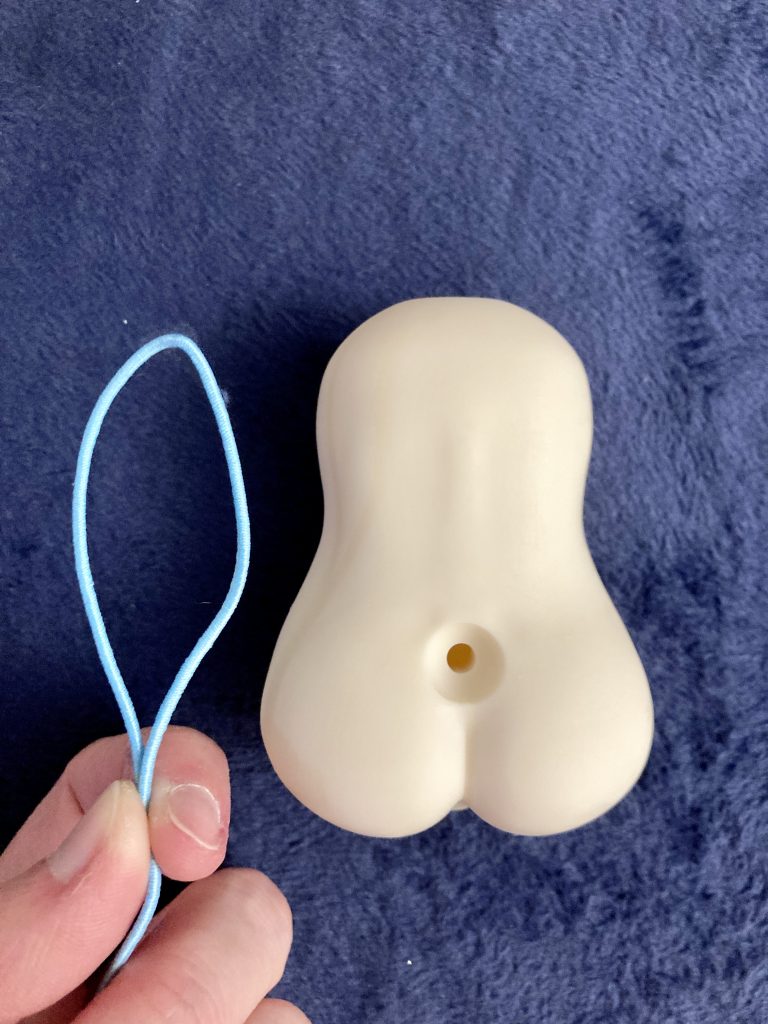
This method involves stringing the legs individually using separate pieces of elastic. It is much easier to do and less complicated than method 1, but it can result in the legs being different tensions if you aren’t careful.
I prefer this method for a couple of reasons. For one thing, I have chronic pain in my hands, so I appreciate the method for being quick and easier to execute. Additionally, I also tend to make my dolls with alternate limb options, and stringing the legs separately gives me more freedom to switch between different pieces, such as a prosthetic leg or amputee stump.
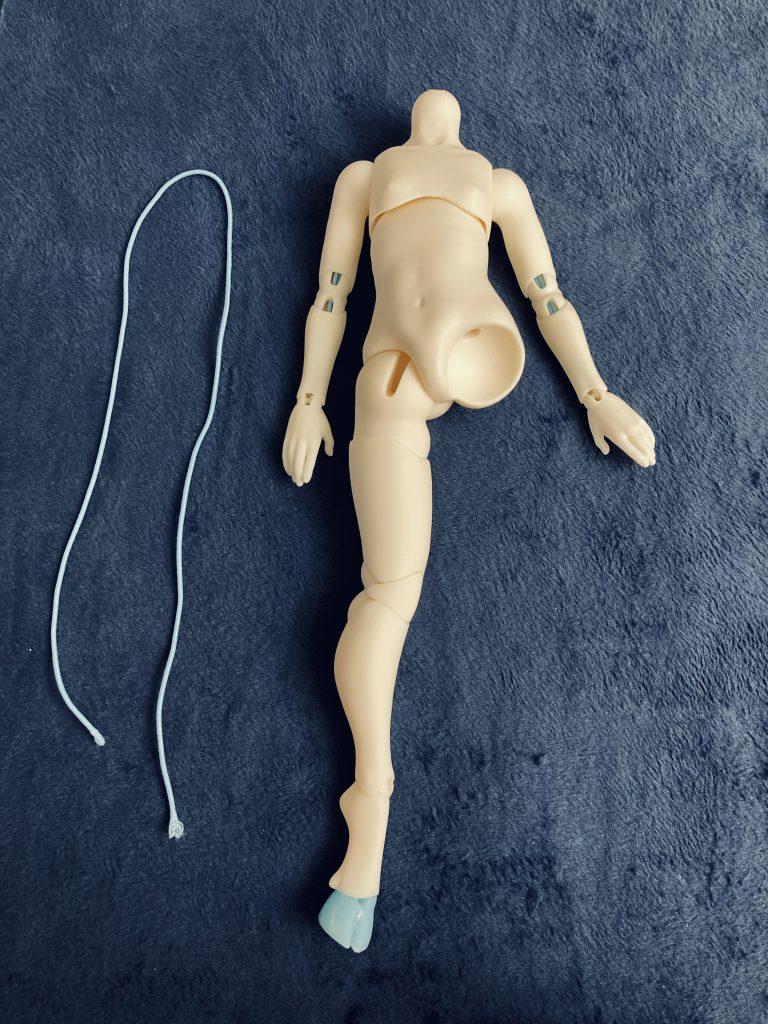
Start by measuring out the elastic, as always. You’ll need an amount that is roughly double the length of the doll from ankle to neck when laying loose on the desk.
You can tie the elastic into a loop in advance like in Stringing the Arms to the Chest (Method 2), but I wasn’t using s-hooks in this doll so I couldn’t do that. Refer to that section if you would prefer to do it that way!
Next, string one leg onto the elastic like before, looping it around the ankle piece (or s-hook) and back up through the hip.

At this point, you’ll want to tie the elastic. Pull the elastic tight, making sure it is the tension you want when the knot is pulled up to around neck height.
Tug on one end of the elastic to position the knot off to one side. You want to keep the knot in the middle of the chest, not up in the neck.
Thread a bit of scrap elastic through the loop to pull the elastic up through the hip socket and out the top of the torso. Hold it in place with something (like a pencil or popsicle stick) while you do the same with the other leg.

Once you have both legs strung, you’ll want to loop your scrap elastic through both loops to pull the elastic up through the neck all in one motion.

Slide the loops over the neck’s s-hook to hold them in place, using the scrap elastic to keep a good grip.
Pop the head on, and that’s it, you’re done!
Bonus Section: Dolls With Strung Tails
I was stringing a unicorn doll, which means she has a tail. Stringing on a tail is not difficult, but I figured I would show you how to do this as well. Typically, you would do this before stringing the doll’s legs on, just so the chest piece doesn’t get in the way, but I didn’t want to interrupt the sections above.

Start by measuring out the amount of elastic you will need. You can do this by simply holding it up to measure the space between the hook in the back and the base of the tail. No need to pull it taut or add any extra elastic. The tension isn’t terribly important for this piece unless you intend to give the doll a particularly heavy tail.
If the tail you are stringing is longer and articulated, then you will need to measure the space between the hook in the torso and the bar at the end of the tail, and you should be a bit more particular about the tension in that case. For this doll, however, the tension isn’t important since it doesn’t really articulate much.

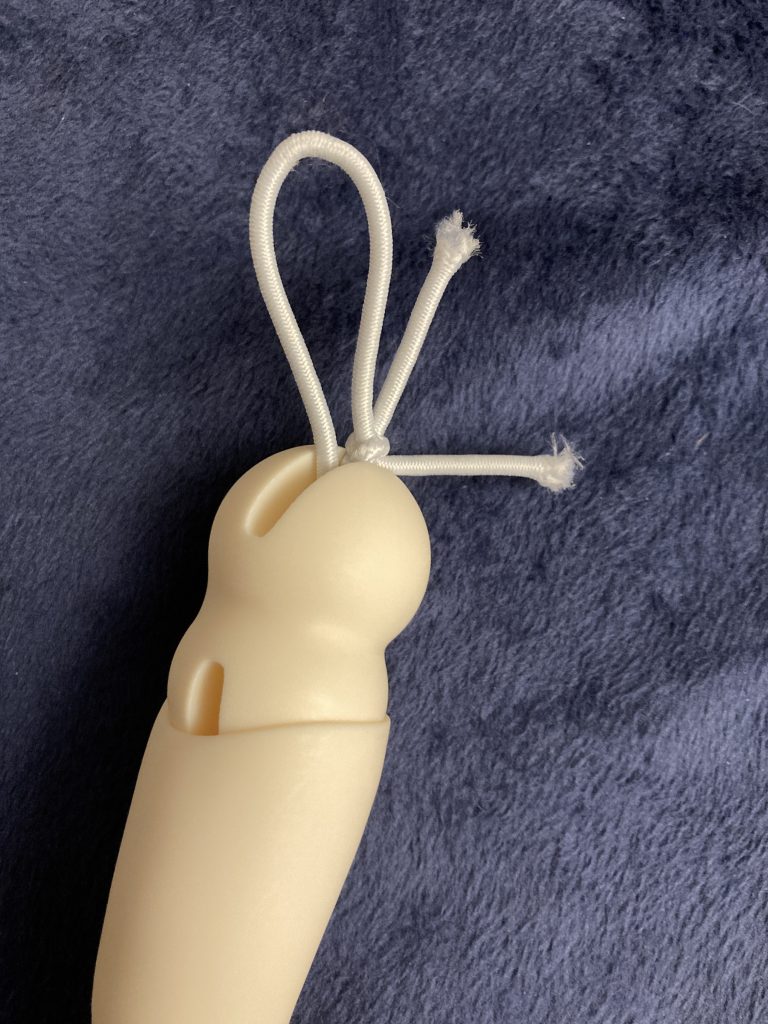
String the elastic through the tail piece, and tie it in a loop. Once it is tied, thread a spare piece of scrap elastic through the loop and use it to pull the elastic up through the center of the body. Pull the loop up and over the hook, and that’s it, you’re done!

If the tail piece is attached via a bar rather than an open hook like this, you will need to use forceps to hold the elastic up at the tension you need and then tie the knot at the end.
Get Help for Bigger Dolls
This isn’t really necessary, but stringing a doll often feels like it requires three hands–so recruit someone else’s! Having someone else to hold down the doll’s shoulders while you pull the elastic up through the neck at the end can be a huge help, especially if you’re stringing an SD doll or one with 3mm or thicker elastic. It can take some serious strength to not get hurt!
I hope this helps! Good luck with stringing your dolls, and if you have any questions about stringing BJDs, feel free to shoot me a message on Instagram or Bluesky @VivifyDolls!~